Friday, August 30, 2013

Cocktail Party Invitation


I have to admit one of my most favorite things to do is host a party! I know all of my friends
and family are out there are laughing at me right now.......like they didn't already know this 
about me.

When my husband and I moved to Longwood, Florida we bought our home in the most
awesome neighborhood. By awesome, I mean warm, friendly and beautiful too!

I was a Northern girl and had such fun adjusting to the ways of Southern entertaining. I loved
the way my new neighbors made us feel welcome from the day we moved in. This 
is such an important feeling for me. Having moved so many times, the "first" of 
anything is like rolling dice, you have a 50/50 chance of leaving with a new friend.

In Florida, unlike the North, your front door is left open for a party, no door bell necessary......
just walk in to the laughter, music and friendship. Of course, the added benefit of no snow 
shoveling in the wintertime was great too!

Although, we are not always able to have our door wide open in NJ, we make sure we greet 
each guest at the door. This personal interaction is so important. Always making sure to guide
them to the food and drink area, and along the way introducing them to other guests.

Well we set our date for our Annual Harvest Cocktail Party. On September 27th, the house 
will be full of new and old friends. It's so exciting!

After setting the date, I started searching for invitations. This year I found a beautiful invitation
with a new company I have never used before; IMPRESSINPRINT.COM. The invitation is 
very important to me. I believe it is a direct reflection as to what type of party it will be.
Fall colors are always so beautiful and warm. With that in mind, this is my printed invitation.
I loved the colors and the added embellishment of leaves on the front and back of the
envelope.


As I prepare my thoughts and begin jotting down my ideas and timeline, I will share with all of you
what it takes, in my opinion, to host a warm and inviting Cocktail Party for friends!


My best wishes to you and your family for a safe and beautiful Labor Day Weekend!

GOD BLESS AMERICA!


Wednesday, August 28, 2013

The Lavender Bouquet: Coffee Nook

The Lavender Bouquet: Coffee Nook: Do you have an area in your kitchen that you throw everything on as you walk through the door? When we first moved in my husband hung a gre...

Coffee Nook

Do you have an area in your kitchen that you throw everything on as you walk through the door? When we first moved in my husband hung a great little set of hooks for our car keys, which we dutifully hang everyday as we come through the door.......but then there is this eye sore!
There was a little corner cabinet unit that the original owner built intended to be a small bar area, complete with upper and lower cabinets and granite that matches the perimeter countertops. The area is much to small for a bar, so it has become a place for us to pile mail, magazines, business cards, coupons....all of the JUNK that creates clutter. I hate clutter! (I cannot believe I am showing you my clutter!) 


If we had built our home from scratch, I would have incorporated a coffee station, but since that didn't happen...... I thought this little area would be a great place to improvise, turning it into a very useful space.

I keep a binder of all of my ideas so I started searching trying to find just the right
solution or at least something I could modify. I loved the idea of an open unit and
being able to grab my coffee mug.......so this is how I started.

I began by clearing all of my junk and finding a new home in the study for it. That was interesting! Then I removed the upper glass door and inside shelving. I made a trip to my favorite hardware store in town and chose a Tuscan Red color to paint the inside  of the cabinet.


 I thought the wall above the granite needed a little something to make it pop so I went to Michaels and bought the following:

In Pinterest, I had seen a framed, burlap background picture with a painted wooden letter in the middle. I rather liked that, so I improvised with the above supplies. I took the frame apart and cut the cork lettered paper to fit neatly in the frame. I then painted the wooded "B" with stencil paint and glued it to the outside of the glass in the center once it was framed.  So easy!

I populated the cabinet with my favorite china, Mikassa French Countryside, and my Christmas cook books...which now have a home. The linen towel (Jacquard Francais) is what I mentioned in an earlier blog that I had purchased in Raleigh at A Southern Season, and they also had them in Chicago at Yvonne Estelles. 

It may not be a Miele Wall Unit, but I am okay with that. When my husband wants his espresso on the weekends, we'll merely make room in our little coffee nook for the added espresso maker. Somehow I think this little re-purposed area is going to please my husband when he comes home this evening......let's see.....1 qt. paint, a trip to Michaels, a little labor from the wife...and what truly brings a smile to his face.........the $$$$ I saved by not installing the Miele!

Have a wonderful day!


Monday, August 26, 2013

The Lavender Bouquet: Chicago Fun!

The Lavender Bouquet: Chicago Fun!: I just returned from a few days off, but had quite an enjoyable time in Chicago with our daughter. What a wonderful City with so much t...

Chicago Fun!


I just returned from a few days off, but had quite an enjoyable time in Chicago with our daughter. What a wonderful City with so much to do. Each day was a different experience. I decided to share a few with you.

My first stop was a Yvonne Estelle's, 11 S. Prospect Avenue, Park Ridge, IL 60068.


   I was looking for a line of linen kitchen towels made in France I had discovered on my trip to Raleigh. The line is called--Le Jacquard Francais. These towels make a wonderful gift for a housewarming party, hostess gift  OR even better, one for yourself. They are simply the most gorgeous towels I have ever seen!


I chatted with the shop owner who shared all of the beautiful lines she carried with me. In the end I left with this Fall colored Beauvulle (printed by hand) tablecloth.  I can't wait to use it at our Fall cocktail party!!


Wednesday was a "special Mom day." My daughter treated me to a
wonderfully relaxing facial with
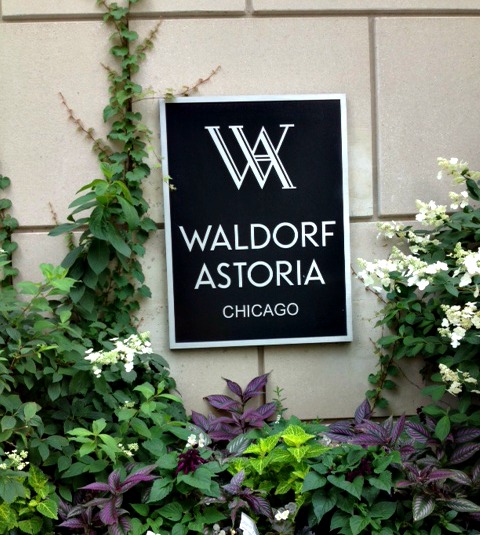
Kathy at the Waldorf Astoria. It was delightful. I felt so pampered....
what a lucky Mom I am!
 

 Call me silly..........but while I was waiting for my Esthetician, in the
comfortable waiting area, the refreshments were delightful. Green Tea Infused Water, Vanilla Bean Infused water (which I learned is merely a fresh vanilla bean pod in water), and the display on the left containing spoons filled with flavored almonds,
dried mango, bacon, etc.
How very cool!

 
  My daughter was in search of new fabric to recover a chair, so Friday we ventured to a  fantastic Fabric Warehouse called the Textile Discount Outlet, on the South side. It was a huge building full of rows and rows of fabrics, trims and everything in between. The prices were a fraction of what we would pay at a fabric chain store. It was quite an experience!
 
Well I am back to reality........leaving some of my City experiences behind...
but not forgotten!
 
I am working on a great DIY project that I hope to complete for Wednesday's blog.
Don't forget to check it out on Wednesday!


Wednesday, August 21, 2013

DIY-How to Make Valances

Good Morning Friends!

I have been requested to post the instructions on how to make the valances that were photographed in my August 16th posting of DIY-Valances.

Good luck and Happy Sewing!


HOW TO MAKE A SIMPLE ROD POCKET VALANCE
 
 
Step-by -Step

I do not use a pattern to make these valances, however, I will share with you some secrets that I learned along the way that I highly recommend you follow. 
 
Hang the rod you plan to use, prior to measuring for fabric. I purchased simple Continental rods, with a 2 ½” rod pocket from JoAnn Fabric on SALE for less than $11.00 each.

Rod placement is entirely up to the individual. In my situation, I mounted the rod simply 1” outside of the frame (just enough to accommodate the hardware); however, I needed some height to my valance to balance things in my room, so I hung the actual rod 12” above the top frame of my window.  You may also hang the rod even with the top frame of the window. This measurement is entirely something you determine based on your windows and what look you would like to achieve. 

 Window Treatment Fabric
This valance does not leave much room for error, meaning, your measurements for your fabric should include the following:

      ·         Width and depth of mounted rod end to end

·         Add enough fabric to accommodate a 3-inch (final measurement) rod pocket at the top

(Don’t forget to allow about an extra 1/2-inch for your finished edge on the hem)

·         Measure  and add enough fabric for a 3-inch FINISHED bottom hem

(Don’t forget to allow an extra 1/2-inch for your finished edge on the hem)

·         Side seams 2.5” finished (add 3-inches for a total of 6-inches for width on measurements)

·         If you would like to add a trim in the same place that I did in the photo, the measurement     would be rod end to end plus 2-inches

****If your material requires a match of any kind ask for assistance at the fabric counter prior to having it cut.

Lining
Lining a window treatment, especially in this case, is necessary. This improves the appearance of the
treatment both inside and out.  When choosing a lining I usually use Sateen, a nice strong fabric.
(or your personal choice)

Measuring for lining-

·         Cut the lining the same length as your fabric but 6-inches narrower in width

 
Sewing Instructions for Valance

1.       Choose and prepare fabric joining the fabric and lining (right sides together) and finish  stitch seams on both sides. (leave both ends open)

2.       Fold fabric & lining so that you have a 2 ½-inch side hem on both sides of panel. Press & stitch.

3.       Finish top edge of fabric by folding down 1/2-inch and stitching. Press.

4.       Fold down top of fabric 3-inches, press, pin and stitch. This creates your top rod pocket.  Press again.

5.       If you are adding a trim, this is stitched just BELOW the rod pocket seam—making sure to   not interfere with the rod pocket.

6.       Finish bottom edge of fabric in the same manner as rod pocket top. Press.

Slip rod through top valance pocket, and hang. At this point you must determine the length that is appropriate for your window and taste. Once you determine where you would like the curtain to fall, measure from the top of the rod to the point you want the drapery to fall on the window.

 
Sewing instructions for the Valance Carrier

 1. Cut 2 pieces of 2-inch wide fabric per window for carriers. (or wider if you prefer) The length is determined by the above measurements you took determining where you would like your curtain to fall. (above)  Mine in the photos is as follows: I hung the carrier 8-inches in from the end of the rod on each side, and down 22-inches. This created the kind of swoop that I needed for my particular window.

 ****For this I needed 2; 2-inch wide by 46-inch long pieces of fabric per window.  Sew right sides together with small seam, turn fabric inside out, and press. Slide over the rod and adjust to your own taste, pin and stitch ends closed.  You may pin and stitch OR if you prefer use the glue gun. Again, it is your personal preference.
 
 
I hope these directions help you create something beautiful!

***If you have further questions, please contact me. at:


Monday, August 19, 2013

Hosting a Cocktail Party

I can't believe it is really time...... Fall is in the stores.....yes it is! My husband was traveling this week so I took the opportunity to stop by our local mall and to check out everything Fall. I had a wonderful time just browsing and of course taking photos!

We are quickly approaching our third Fall back in the Northeast. I have to say we both LOVE
the Fall colors and the coolness in the air that only the North can provide. Last year we hosted a Fall cocktail party we named the "Harvest Cocktail Party." We just set our date to continue the tradition this year which will be on September 27th.

With the date being set I couldn't wait to get into the stores to see the 2013 Fall décor displays.
The colors are fabulous, burgundy, purple, brown, and emerald to name a few. Of course they have much more elegant names like; Acai, Carafe, Lichen Green, etc. I think you get the picture.

As I start to gather my thoughts and start my planning process for our cocktail party, I will be sharing the prep and execution along the way. I have been asked by several readers to share my steps from the beginning planning stages to the end result of "how to throw a successful Cocktail Party".


Getting ideas at Pottery Barn!


The added benefits of planning a party! Have a wonderful day.


Stay tuned..........


Friday, August 16, 2013

DIY Valances--Family Room Renovation

It never ceases to amaze me as I look back at the photos of when we took possession of our new home and compare them to what it looks like today!

When our realtor and I brought my husband to the house I walked him through all of the rooms and said, "Honey, this house has great bones, picture this and this and this."

After being married as many years as we have --36,  he still always looks at me, shakes his head, and says, "Are you sure?"  Well folks, I was sure! I was so sure I am sharing with you our final Family Room Fireplace wall complete with the side valances that I finished yesterday. Take a look at the BEFORE and AFTER photos and let me know what you think.

****I also want to note that an episode of HGTV "Love it or List it," just aired yesterday and they used my Mercier wood flooring in the home! Woot woot!

Hope you enjoy the photos----

**If you are interested in instructions on "how to" create these valances, please drop us a
message in the Comment section. I would be more than happy to provide this for you.


Family Room Fireplace BEFORE we purchased the home.

AFTER----Valances finally finished.........project finished! If you search our archives
you will find the Family Room complete Renovation project--start to finish!


 The wall on the right in this photo

showcases the two-story drapery I made prior to the valances. I wanted this wall to give the room a much more dramatic feel. Simple elegance!
HOME SWEET HOME!


Wednesday, August 14, 2013

Delicious Jicama!

If you have ever had time to really peruse the fresh vegetable section of the grocery store you
will see some very odd looking vegetables. I have asked myself, how do you cook this, how do you eat this?

A few years ago my entire family was coming for a visit to our Longwood, Florida home. When we have a house full of guests, I am always looking for recipes that can be made ahead so that my kitchen time is limited while entertaining. Besides, catching up with family and pool time was much more fun than being stuck in the kitchen!

I came across a recipe that had a Mexican root vegetable called Jicama in it. When I located it at the grocery store I couldn't believe how ugly and hard it was. It's appearance is ovalish in shape, light tan/brown skin on the outside, and a creamy white crunchy center; something I would never have purchased had this recipe not called for it. (Don't be afraid to ask your produce person to help
you locate it.)

I was pleasantly surprised at how easy and delicious this recipe is. Jicama is delightful, crunchy and
mixed with the citrus dressing and additional ingredients becomes a nice light summer salad. Making it ahead just enhances the flavor......in fact I prefer it that way. Be prepared to make a double batch...........it makes a great picnic salad too!

Hope you enjoy your jicama!


Jicama, Tomato and Black Bean Salad

3 tablespoons fresh lime juice
1 garlic clove, minced
1/2 teaspoon ground cumin
3 tablespoons extra-virgin olive oil
1 (15 oz.) can black beans, rinsed and drained
2 plum tomatoes, chopped
3 tablespoons diced red onion
1/4 cup chopped fresh cilantro
Salt and freshly ground black pepper

Whisk together lime juice, garlic, and cumin in a large mixing bowl; slowly whisk in oil.
Add beans, jicama, tomatoes, onion and cilantro. Toss to combine, season with salt and
pepper, and serve.

Makes 4 (1 cup servings)
YUMMY---Calories per serving 190

***This recipe was taken from the South Beach Diet Quick and Easy Cookbook


Monday, August 12, 2013

The Lavender Bouquet: Foyer Renovation Project

The Lavender Bouquet: Foyer Renovation Project: I hope you all had a great weekend! Ours was filled with accomplishing a "to do" landscap...

Foyer Renovation Project

I hope you all had a great weekend! Ours was filled with accomplishing a "to do" landscaping clean- up list. It was a beautiful weekend here and even though we would rather have been doing something a little more fun, it was quite nice enjoying the serenity of the outdoors.

I decided to show some quick photos of the Before and After of the "Final Foyer" of our new house. In the archived blogs you will find my marble floor segment where the marble was honed and cleaned taking it from dull to fabulously shiny! This segment shows the finishing touches with new wall and railing paint color, lighting (chandelier) and furniture completed.

I hope you enjoy our Foyer Renovation!


This is the foyer prior to our closing on the house. Dull, dirty marble floors, old paint color and railing color.


This photo shows the new wall & railing colors, the staircase that has been cleaned sanded and re-varnished and the honed and cleaned marble floor.

The completed project has given our foyer a fresh new and updated look with a warm WELCOME feel!

Friday, August 9, 2013

Mouthwatering Turkey Burger

Have you ever gone to a restaurant and ordered a turkey burger and when you tasted it, it was tough like leather, dry and tasteless?
 
A few years ago I came across a recipe that was intended to be for turkey meatballs. My family loved them so much I thought why not use this recipe for burgers. So I tweaked the recipe a bit and it has now evolved into our family's favorite Turkey Burger!
  
One pound of fresh ground turkey makes 3 patties the size above.
You can see the herbs and grated Parmesan cheese---yummy.
By the way, the beautiful tomato in the back right corner of this
photo was freshly picked from my husband's tomato plant. I can't
believe how picture perfect it looks.........and it was so delicious too!
By adding a little olive oil to my fry pan and cooking the burger with the lid on the pan,
it steams a bit, and browns on the bottom slightly...giving it a little
 crispiness on the outside.
As a parent of a daughter who is employed by the Heinz Company, I would be remiss
by not displaying a new condiment they are marketing---Jalapeno Ketchup that now may be found on your grocery shelves. If you like a nice kick to your burger,
 give this a try. I love it and I know my brother will too!

 I hope your family enjoys my Turkey Burgers as much as ours does!

*********************************************************


TURKEY BURGERS
 
1 pound lean ground turkey
1/2 cup Panko bread crumbs or fresh bread crumbs
1/4 cup finely chopped onion
1/4 cup grated Parmesan cheese
2 tablespoons chopped fresh parsley ( you can use dried also, just use less)
2 teaspoons minced garlic
2 large egg white, beaten until frothy
1/2 teaspoon each salt, and dried oregano, and dried basil
1/4 teaspoon freshly ground black pepper

Directions

In a large bowl combine turkey, Panko, onion, Parmesan, parsley, garlic, beaten egg whites, salt, oregano, basil, and pepper.  Mix lightly but thoroughly.

With moist hands divide the turkey into 3 burgers and press lightly.

Heat 2 tablespoons of olive oil in a fry pan on medium heat. Add the turkey burgers to
the pan and cover. Depending on the temperature of your stove top, you should be able to flip the turkey burger within 4-5 minutes. It will stick slightly to the pan. Slightly brown both sides, decrease heat to low, cover and let it steam for approx. 3-4 minutes.  Total cooking time may vary. Always check the center of the burger to make sure it is cooked thoroughly.


Thursday, August 8, 2013

Sunflower Bouquet

Sometimes making a simple trip to the grocery store can result into a little more than food shopping for me. This is such a lovely time of year for floral bouquets. I always take a few minutes at the end of my shopping  trip to enjoy the beautiful flowers our local market displays. Typically, the prices are very reasonable when something is in season, hence my purchase of these beautiful sunflowers.

 I always like to add a touch of deep purple in the form of a very airy flower, to fill in the vase. Simple and easy. There is no fussing with sunflowers, they are just simply beautiful rays of sunshine, a wonderful gift from God.

A bouquet of flowers can say so many things; I Love You, Wishing you a Wonderful Day, Hope You Feel Better Soon, Thank You for Being My Friend, With Sympathy, Happy Birthday or Anniversary.
They are the gift that will always bring a smile to someone's face.

Why not take home a bouquet for yourself or someone else to make their day. As they say, "a smile is worth a thousand words"!

Enjoy!


Wednesday, August 7, 2013

Delicious Raspberry Bars!

There are some days when I just want to bake something sweetly delicious. When I feel like
this I make sure that it is something that my husband can take to the office for everyone to enjoy.
It is a win win situation, the office loves a sweet treat once in a while, and I won't partake
of too many bars by keeping them at home--which is also a good thing.

It was a particularly nice day yesterday, mid 70's, windows open and sun shining. I decided to pull one of my favorite Ina Garten (the Barefoot Contessa) recipes, Raspberry Crumble Bars.

Usually this recipe is baked in a 9-inch square baking pan, but since I was making this for the office, I doubled the recipe and used my 11 x 15 inch baking dish. Copy & paste this link for the recipe: http://www.foodnetwork.com/recipes/ina-garten/raspberry-crumble-bars-recipe/index.html


These bars are so easy to make. The photo above shows the lightly patted crust spread with raspberry jam. I used seedless as many people are not fans of the seeds in raspberries.
The recipe calls for 45 minutes to bake in the 9 inch pan, however, the baking time for my larger version was approx. 40 minutes. I suggest watching the bottom carefully so as not to
over bake.
Awwww------they smell so delicious when they are baking. I couldn't wait
for a sample with my morning coffee.
These delicious little raspberry bars are sitting on a "special tiered dish" that arrived at
my home last week, along with other goodies, from my dear friend
Patty J. in Minnesota. I love presents especially when
they are from the heart........thank you Patty for
 the beautiful gifts, but especially for your kind words of encouragement
as I venture into this new blog world!

I hope you all enjoy these sweet treats!


Tuesday, August 6, 2013

It's Not Your Mama's Fish--a healthy twist

The American Heart Association recommends eating fish at least two times a week so I decided a few years ago that we would incorporate this healthy eating style into our household. With fish being rich in omega-3 fatty acids, vitamins and so much protein, it seemed prudent to get on the band wagon.

I started searching for simple fish recipes that did not contain a lot of unnecessary calories. My husband loves a nice mild (Wild) Cod and although I love Cod as well, I usually choose a Wild Salmon, Coho being my favorite. Whatever type of fish I choose, I always purchase Wild not Farm Raised. It is more expensive, but in my opinion a much safer choice. Click on this link for more information: http://seafood.edf.org/guide/best

Last evening I prepared two recipes from my favorite dietitian/cookbook author, Ellie Krieger. The first is a Miso-Glazed Cod (The Food You Crave pg. 231 OR http://www.foodnetwork.com/recipes/ellie-krieger/miso-glazed-cod-recipe/index.html?ic1=obinsite ) with the accompaniment of Sesame-Stir Fried Chinese Greens (The Food You Crave pg. 258 OR http://www.foodnetworktv.com/recipes/sesame-stir-fried-chinese-greens.html ). They are both delicious and easy to prepare.


 I used Ellie's recommended Baby Bok Choy which is plentiful this time of year. I have seen it in the grocery store as well as the local Farmer's Market.

One 6-oz. fillet is 220 healthy calories and
 one 3/4 cup of greens is 61 calories.
Those are great numbers for a nutrient packed dinner.

ENJOY!
 

Monday, August 5, 2013

A Very Special Wedding!

Every day a wedding is taking place somewhere in this world.........but on Saturday, August 3rd a very special wedding took place on a lovely sunny day in a beautiful vineyard in Michigan. Our youngest daughter was a bridesmaid in the wedding of her dear friend, Amy. The girls became friends in college when they joined the same sorority at Indiana University about ten years ago.

Our daughter called us after the wedding giving us all of the heartfelt details that made the day so special. The tone in her voice was full of love and admiration for her friend.  Amy is a survivor, having had "two" different types of Cancer as a child/young adult. Needless to say, Amy, her family, and her new husband, have felt more pain than joy for many years.

This wedding was not only a celebration of a pure love, but a celebration of life.....wishing Amy and Brad a lifetime of happiness!


Thursday, August 1, 2013

A Little TLC--Home Exterior Before & After

Over the years the homes we have purchased have changed not only in location but in architectural style. Our Northern and Midwest homes always had some sort of brick exterior, some full, some partial.  We love the warmth that brick exudes.

When relocating back to the Northeast from Texas we found many home exteriors that brought back those memories for us. We settled on a red brick front home, with siding encompassing each side and rear.

The first day we took possession of our home all of the existing landscaping was removed. It was all overgrown and the beds were in great need of some TLC.


The Master Bathroom window is hidden behind these overgrown shrubs.


It's never wise to have trees growing over your home!!The beautiful Holly tree in the foreground was the only tree we saved. It was trimmed in a pyramidal shape and still stands beautifully.

The guys deserved a break after all of that work!


Time for the painting crew to work their magic. We had all of the trim, shutters and doors painted.


When Jose started sanding the RED front door, he found this surprise from owner #3 underneath.
 
Now we are getting somewhere close to my vision!!
Finally finished.......but not without our landscaper giving us the Rutgers "Do Not Plant" list. It appears that the "14" deer that call the wooded area in back of our home, "their home," left us with a selection of one thing..... Boxwood. We happen to LOVE Boxwood hedges (they remind me of Versailles).......so when these little guys get bigger and grow together we will have a deer resistant hedge! Until then, Scott's Lawn Service to the rescue with a continuous diet of fertilizer speeding  up the growth.

The inset of Belgium block on our driveway at the front door contained some black tar pieces that  my husband wanted removed. To remedy this he found an Eco Friendly company that sand blasts with tiny glass beads. It was quite an interesting process to watch.  As you can see  the black tar came off in small pieces and the final product (below photo) makes the block look brand new.

This concludes our exterior front and sides renovation. I hope you have enjoyed the transformation from our ugly duckling to "the place we call home." Nothing we did was difficult, just time consuming...........I even stayed within budget!

From our home to yours.........happy planting and painting!