Showing posts with label Autumn. Show all posts

Monday, September 19, 2022

USHERING IN AUTUMN

 Good Morning TLB friends,

The first day of Fall is September 22nd and I'm ready! 

Friday, October 16, 2020

I LOVE OCTOBER

Hello Friends-

I'm so glad I live in a world where there are Octobers!

L.M. Montgomery


October is one of my favorite months. The changing of colors that only Fall can bring is something I always took for granted when living in the North. The beautiful foliage, apple picking, and pumpkin spiced drinks for those crispy Fall days.

We weren't able to find a "pumpkin farm," however we were able to buy two beautiful pumpkins in good ole' HOME DEPOT, one orange and one white!

Hubby sprayed the pumpkins with his famous Rustoleum Clear Laquer, giving them more longevity in the warm weather. We plan on carving the orange one for Halloween---we are hoping it lasts that long!

Our cul-de-sac of homes are all decorated and ready for Halloween. Since our development is new, we haven't been able to meet our "new neighbors,"  except for a wave or my favorite..."I'd be over with a plate of cookies, if it weren't for this darn Covid!"

There is one thing we can all start out our morning's with, a little treat in our coffee "Pumpkin Spice Coffee Creamer!"

Have a spicy Fall day!

Kathleen

****************************************************************************

Pumpkin Spice Coffee Creamer

 Ingredients

Makes about 2 cups of creamer

2 cups Almond Milk*

2 tbsp mashed pumpkin (canned is fine, but make sure it’s just pumpkin and not pumpkin pie)

2 tbsp maple syrup**

1 tsp cinnamon***

¼ - ½ tsp nutmeg***

¼ - ½ tsp ground cloves***

¼ - ½ tsp ground ginger***

½ tsp vanilla extract*

* If you use Vanilla Almond Milk, you may not need to add any additional vanilla. You can also use Soy Milk, Rice Milk, Flax Milk, or Hemp Milk. Do not use animal milk - it will separate, go spoil quickly, and taste off.

** Adjust to taste and desired sweetness. If you use sweetened Almond Milk, you won’t need as much sweetener. Fair Trade/Equal Exchange brown or white sugar or agave nectar can be substituted for the maple syrup. The Maple just Falls up the flavor that much more.

*** Adjust spices to taste. You can also substitute pre-mixed “pumpkin pie spice.”


                                                   CHEERS!


Wednesday, September 18, 2019

NORTHWEST FALL

Hello Friends!

Welcome back to THE LAVENDER BOUQUET!

I'm not quite sure where this year has gone, but I am excited about our first "Fall in the Northwest." The evenings are becoming much cooler, the students have arrived back on campus and the town is bustling once again. Summer's are pretty quiet here.

I found that the typical mums I was used to from the East aren't as plentiful here, although
I did find some along with some Lantana to provide color on the front porch. The selections were limited so my tried and true Eastern big box stores came through for me for the Mums, and I was able to find the Cabbage, Lantana, Dusty Miller and Fountain Grass at our local nursery.

With a majority of our worldy goods stored in Texas I don't have the decorative
seasonal items that I am used to grabbing from my boxes. I round a TJ MAXX 
where I found the corn husk wreath (bare) on the front door. I added the ribbon and leaves for some color.

I found the decorative pot online at:
Pumpkins and Gourds 15" Art Planter, Outside/Indoor Planter, Gardening, Pot, Fall, Autumn, Thanksgivingand the pumpkins at our local Costco. The sweet bird pillow I couldn't resist because our grandaughter LOVES birds. I found it at our local Wal-Mart. I brought the large gray planter with me from the Texas house.

Chain stores make shopping so much easier when you move from State to State! I'm always looking for something familiar, something that I am used to. You would be surprised how many are not located in our new little town.


DIY Cornhusk wreath......


Please feel free to leave a comment and share with me how you are 

decorating for Fall this year.


I'd LOVE to hear from you!


                           Kathleen


Tuesday, September 10, 2019

UNIQUE PUMPKIN DECOUPAGE

Hello TLB friends!

I was recently browsing other bloggers to see what they were up to in regards to FALL creative ideas! Low and behold I found a blog that is using the same idea that I used and published on my 9/10/14 blog!! It was such a fun project I thought I'd share it with you once again. 

HAVE A FABULOUS DAY!
Kathleen
**************************************************
9/10/14

I'm feeling a bit nostalgic today after completing this DIY. My girlfriends and I used to get together one night a month and make all kinds of craft projects. It always was such a great time and ended up being a great outlet for all of us Moms to enjoy some adult time.

One of the things we worked on was a decoupage project. Truth be told, at his moment, I couldn't tell you what I made, but as I worked on this project I remembered there were a lot of "sticky" fingers that night!

I decided to decoupage a faux pumpkin this year.Now what would I use to make this pumpkin beautiful?? I always have a good supply of napkins leftover from whenever we entertain. In searching through my fall stash I came across a stack of beautiful Caspari napkins with Bittersweet branches in gold, crimson and orange. They were just perfect!


I started by gathering the following supplies:

1.  Faux pumpkin (size is personal preference)
2.  1-container of Mod Podge (I used Matte finish)
3.  Sponge applicator or paintbrush
4.  Scissors
5.  Cut strips of napkins, paper, fabric in approx. 4 inch wide 
pieces.
6.  Cut squares in whatever width you like to act as a patchwork where needed. It kind of gives the final project a 3D appearance.


INSTRUCTIONS: 

1.  Clean the pumpkin making sure it is clear of  any raised imperfections.

**If you use Caspari napkins remove the white bottom layer of the napkin before gluing....you can see what happens in this photo with the white backing---the result is more wrinkles.

2.  Apply Mod Podge with sponge applicator working in lines from top to bottom of the pumpkin. (I applied glue to a 3-4 inch strip of pumpkin and it worked well.) 
3.  Cut out strips or squares of napkin/decorative paper/fabric. Size is personal choice. I liked using some strips in the beginning because the crevices of the pumpkin were easier to manage. Then to finish up I used a patchwork like look and applied squares.
4.  Smooth out wrinkles as best you can by lightly tapping with a dry sponge applicator. This helps especially in the crevices of the pumpkin. You will get some wrinkles.
5. When the entire pumpkin is covered apply one more coat over the entire surface area to seal the project and let dry thoroughly.


In the photo above the pumpkin is still very wet. The wrinkles and patches are much more prevalent. The final photo below is after hours of drying.


In next Monday's blog you'll see where I incorporated my pumpkin into the fall decorating at my house.

I hope you enjoyed today's blog. Have you ever decoupaged anything before? Do you think you'll give it a try?

Just remember, the final product doesn't have to be perfect to be beautiful........beauty cannot be judged objectively, for what one person finds beautiful or admirable may not appeal to another.

Wishing you a beautiful day!

Kathleen

***Thanks so much for stopping by. We love visitors! Feel free to pass our blog along to all of your friends.  http://thelavenderbouquet.blogspot.com  THANK YOU!!


Friday, September 15, 2017

PRESERVING PUMPKINS & GOURDS


HAPPY FALL!

Our weather has been so fantastic lately I find myself wanting to spend more and more time outside. Temps in the mornings in the mid 60's and by afternoon low 80's. These temps are such a sweet spot for me. I love them!

I ventured out last week to my two favorite garden/nursery centers and bought mums, gourds and pumpkins. I've always felt a little frivilous when purchasing a bunch of pumpkins and gourds only to have them rot or get eaten by wildlife before Thanksgiving. Usually I would be hesitant to purchase them so early, but this year I came across a way to extend their life (I hope), to preserve them....until Thanksgiving!


What you will need:

-Bleach and water
-Dobie scrubber (or something similar)
-Clear lacquer sealant spray

Step #1:
Wash pumpkins and gourds in a solution of water and bleach. 
Scrub with a soft pad, like a Dobie pad so as not to scratch
the pumpkins or gourds.

Step#2:
Dry them off with a towel and lay in the sun for the remaining dry time.


Step #3:
Coat each pumpkin or gourd with 2 coats of lacquer. Let dry thoroughly and enjoy for the season!


Have you ever had an issue with rotten, moldy gourds or pumpkins like me? You may want to give this little trick a try!


                       Wishing you a wonderful weekend!


Kathleen


Wednesday, September 28, 2016

THROWBACK---PRESERVING PUMPKINS AND GOURDS


Good Morning TLB friends,

As I am starting to decorate the exterior of the house for Fall, I thought I would re-share one of the most visited blogs I have written. It was appreciated by so many of you as you prepare for your own decorating......here ya go!


HAPPY DECORATING & PRESERVING!


Kathleen
Just click on the link below:

http://thelavenderbouquet.blogspot.com/2014/09/preserving-pumpkins-gourds.html

Wednesday, August 12, 2015

DIY CUTEST PUMPKINS EVER!

Welcome to Wednesday friends! 

Last week as I entered Hobby Lobby I couldn't believe the store....it was full of FALL and CHRISTMAS decor. 


Thursday, November 6, 2014

NEW FALL COLORS ROYAL BLUE & ORANGE

Happy Thursday friends!

It's been no secret that I am in love with the color combo of deep royal blue and orange. The first time I laid my eyes on a photo of these two colors together was in Better Homes and Gardens magazine. To say I am obsessed is an understatement.

I searched my entertainment pantry and found the perfect vases to use to create this vignette. I can always count on my favorite grocery store for great priced floral bouquets. I bought orange daisies (mums work great too), grabbed some bittersweet vine, mini pumpkins and the perfect gold tray. 

Come take a look........


Are you a fan of royal blue and orange like me? Tell us what you think about this color combo. It's a nice twist to the traditional Fall colors.

Wishing you all a wonderful Fall day!

Kathleen

***Just a quick note......there will be no FOODIE FRIDAY post tomorrow. We will see you on Monday! Have a great weekend!

Monday, September 29, 2014

FALL HAS ARRIVED AT OUR HOUSE!

 Good Morning Friends!

I hope your weekend was a good one. We had a nice relaxing couple of days.

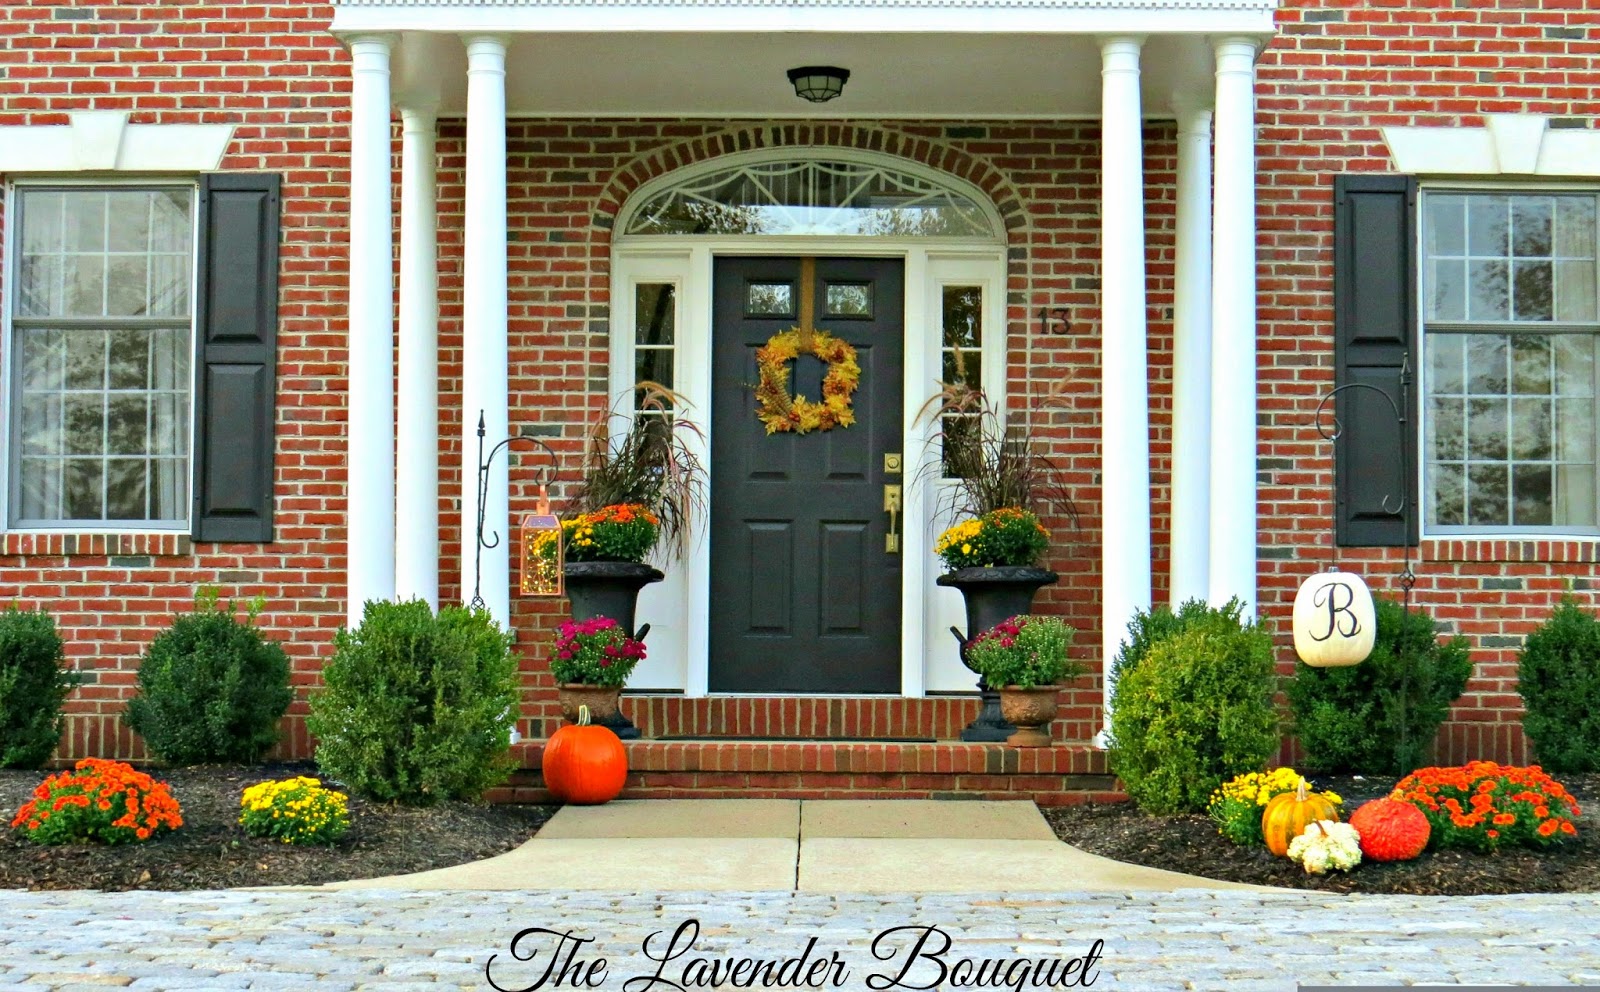
A few weeks ago hubby and I made the trek to the garden centers and picked up some mums, pumpkins and gourds. Today I'm sharing the front of our house that's now  Fall ready!


Every year I try to change the decor up a bit. I'm still a fan of using the typical Fall colors. But this year I added a simple copper lantern filled with Stargazer lights to the mix.


To give you an idea of how beautiful the lantern glows in the evening.....I snapped this pic.


The light from the copper lantern projects over the porch and sidewalk. The lights inside the lantern are called Stargazer lights. I purchased the light strings and Copper lantern on our recent trip to Terrain in Glen Mills, PA. 
(http://www.shopterrain.com/glen-mills/)


Using purple fountain grasses at the back side of my pots adds a nice height to them. I love the airy feel of the grasses as they sway in the breeze. The colorful mums add just the right amount of color to the mix.


The monogram pumpkin shown here I made last year. It's quite simple. I used a stencil to trace the letter and then used a fine paint brush dipped in black paint to fill in the outline.

The wrought iron hanger that the pumpkin is hanging from is actually a rod that goes through the pumpkin with special washers at the end. We purchased this at the Country Living Fair in Rhinebeck, NY from 1st Creations

Here is the direct link where you may order them -----they are called flower pot hangers. (http://fuerstcreations.com/store/garden.html)


I like to use 3 colors when I decorate for Fall. This year my cushion mums are yellow, rust and a ruby pink color. Similiar to some of the Fall foliage we will shortly begin seeing.

Well, that's it for outside Fall decor at our house. How are you coming along on your decorating? What color is your favorite mum?

I hope you've enjoyed the photos of the Arrival of Fall at our house. 

Don't forget to stop back on Foodie Friday!

Kathleen

****Thanks for stopping by! 

Friday, September 26, 2014

YUMMY CARAMEL APPLE BARS

Welcome to Foodie Friday my friends!

Our area apple orchards are abuzz with apple picking right now. The harvest festivals with "everything apple" are all around us. I love this season.......and can I tell you how much I love apples? How about you, are you excited about fresh delicious apples? 

I'm afraid my enthusiasm for apples has me blogging about another apple recipe. There's something about apple and caramel that appears to be on my radar this season. 

I found a recipe for Caramel Apple Bars. What I love about these bar cookies is that the topping reminds me of the center of an apple pie...soft and moist with a touch of cinnamon.

The recipe starts out with a bottom crust made with oats, flour, cinnamon and other goodies which is baked.


The crust layer is then topped with a caramel and heavy cream mixture. Last but not least a delicious fresh apple layer sprinkled with 1/2 cup of the reserved crust ingredients. 


And then it is re-baked till golden brown.


Don't they look delish? And the combination of the soft chunky apple mixture with the crunchy caramel crust...YUM! What a great Fall combination.

You may find the recipe here:
http://www.bakeorbreak.com/2012/09/caramel-apple-bars/

I hope you enjoyed today's blog. What are some of your favorite apple recipes.....please feel free to share with us we'd love to hear from you. 

Our blog and FACEBOOK page THE LAVENDER BOUQUET have so many new friends......we'd like to say WELCOME

Please stop by for a visit anytime and tell your friends!  If you'd like to receive our blog via email, simply go to:  http://thelavenderbouquet.blogspot.com and add your name in the email box located on the right hand side. You will be prompted to verify your request by word verification. Then the blog will be delivered directly to your email account every Monday, Wednesday and Friday!

May your weekend be filled with the warmth and sunshine of a beautiful Fall day!


Kathleen

*****JOIN US MONDAY AS WE SHARE OUR OUTDOOR FALL DECOR!


Friday, September 19, 2014

TASTES AND SCENTS OF AUTUMN

Welcome to Foodie Friday!

Autumn or Fall, as many say, is upon us....only 4 more days until it's officially here! Our local weather reports that by next week here in the northeast we will be experiencing that first real bite of Autumn.

I love to bake this time of year. I'm so glad that my hubby's office loves baked goods or I'd have to double up on the daily workouts!

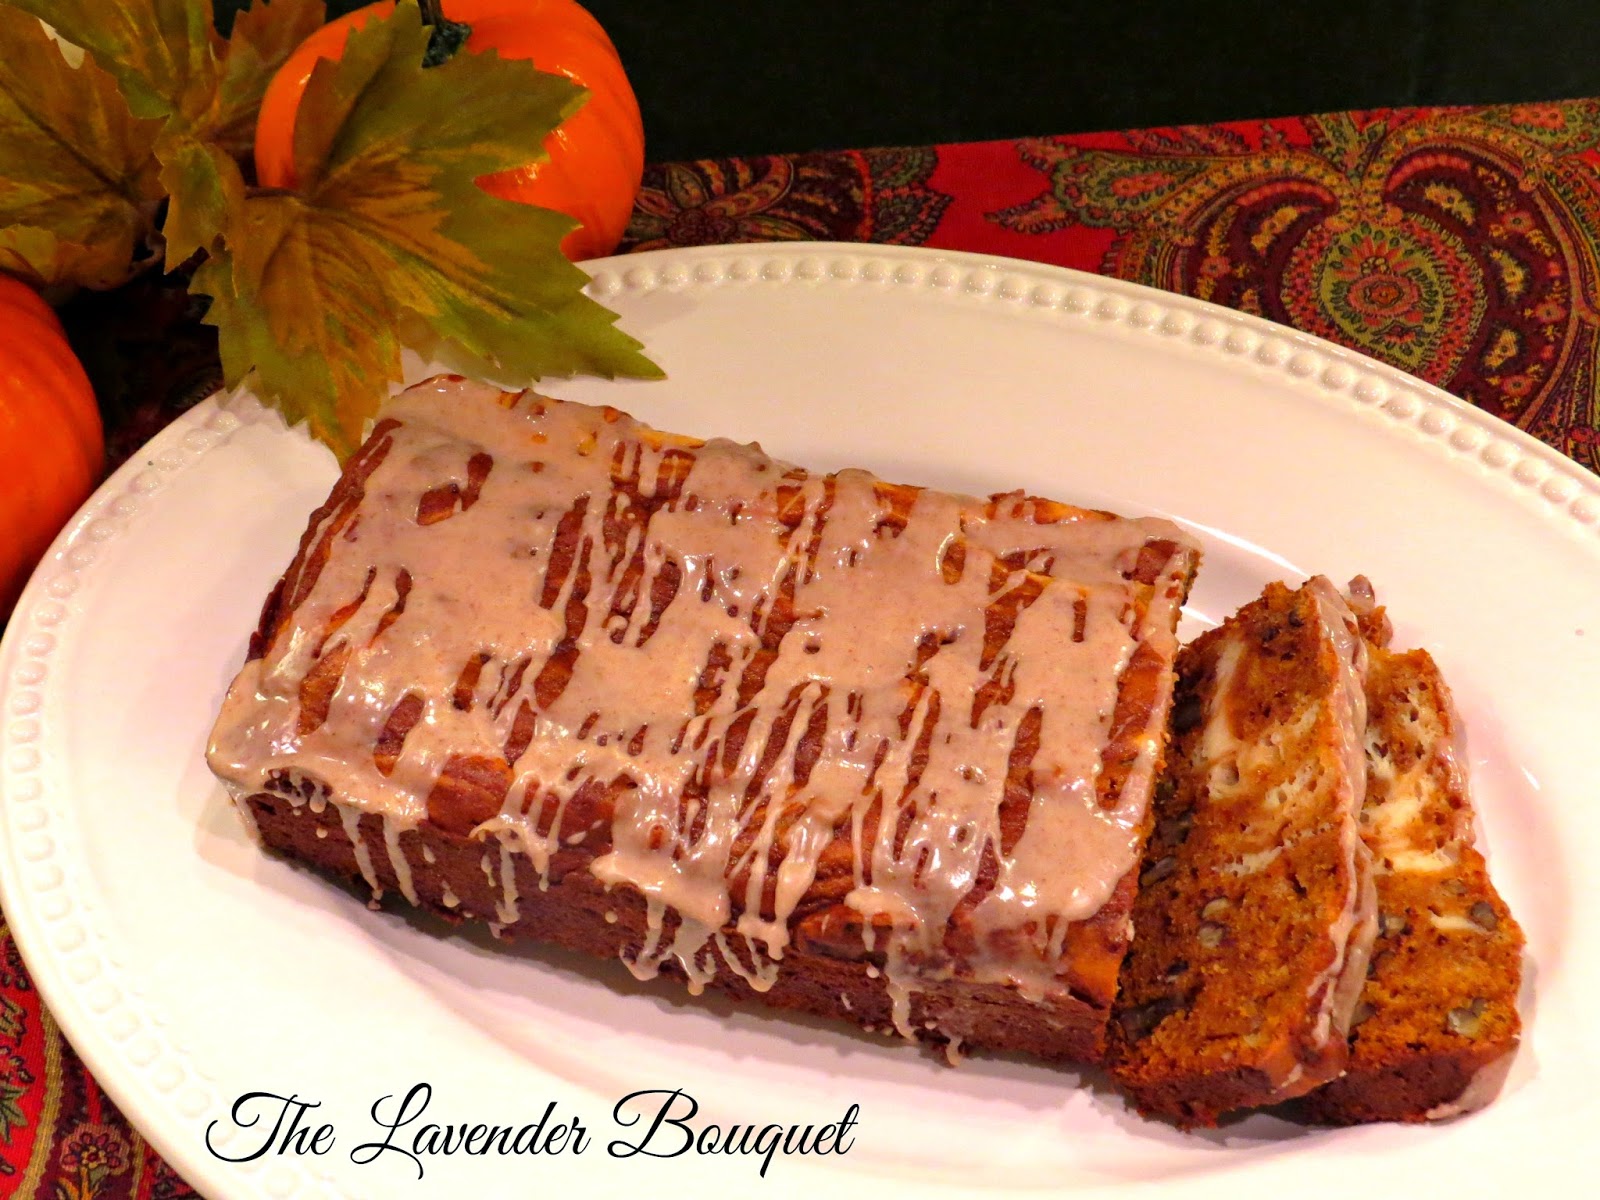
Today's blog is all about tastes and scents of Fall starting with Pumpkin Cream Cheese Bread and ending with my favorite Williams Sonoma Mulling Spices.

My interest peaked when I saw the recipe for this unique bread. They had me at the cream cheese center, but then topped it with a cinnamon glaze.....this was too luscious to pass up.  It's a nice twist on an already delicious fall bread.

 Step #1
-Prepare the bread batter according to the recipe. Pour half of the batter into two prepared loaf pans.

Step #2
-Prepare cream cheese filling according to the recipe.

Step #3
-Drop three spoonfuls of cream cheese into each pan.

Step #4
-Swirl the cream cheese with a knife through the batter.


Step #5
-Bake and cool.


Recipe may be found here:

http://nancycreative.com/2010/10/08/pumpkin-cream-cheese-bread/

Step #6
-Drizzle with cinnamon glaze.


If you don't have time to bake there is another way that your home can smell just as wonderful. It's using mulling spices.


Williams Sonoma sells Classic Mulling Spices that may be added to cider or wine and brought to a simmer. The fragrance and taste is full of their signature blend of spices and citrus peel. It makes you want to curl up by the fireside with your favorite blanket and a good book!

Nothing says "WELCOME TO FALL" folks like a warm glass of mulled cider or wine. Wishing you a wonderful weekend filled with everything that makes you feel warm and cozy!

Kathleen

***Sharing on Monday our beautiful trip filled with gorgeous eye candy and lots of Fall decor ideas! You won't want to miss this FALL EXTRAVAGANZA!

Wednesday, September 3, 2014

DIY AUTUMN WREATH

I ventured out to some of my favorite craft stores yesterday in search of Autumn inspiration. I was basically looking for a new way to make a wreath for my front door, something a bit different by using a square shape. The selection was pretty limited. Square is just not that popular, however, the square wire wreath frame below seemed just perfect.


Then came the dilemma of how and what will I attach to the frame?? Searching up and down the aisles at Joann Fabric I came across a beautiful leafy garland with shades of gold, brown, red and orange. It was more than sufficient in length to provide all of the leafy fullness that I needed to cover the frame.


I started by attaching the garland with florist wire directly to the frame.  


As I worked around the perimeter, then trimmed some of the leaves from the garland and hot glued them to strategic places so that the metal frame was not exposed.

To embellish the wreath adding faux acorns, small purple berry clusters and pheasant feathers seemed just enough for that touch of Autumn. In lieu of a bow, I chose a simple piece of burlap ribbon to secure the wreath to the top of the door.


The materials used made it difficult to create nice sharp corners, but the final DIY showcases a brilliant display of Autumn greeting our guests at the front door.

Are you making an Autumn wreath this year? What are you using for your frame.......grapevine, wire, twig? Feel free to share your ideas with us....it's a great way for all of us to learn!

Wishing you a wonderfully creative Wednesday!

Kathleen

***Thanks so much for stopping by today and WELCOME to ALL of our new friends!! Our blog subscribers and Facebook page has grown immensely during the last week. See you on Thursday for Devine Find!