Showing posts with label Ethan Allen. Show all posts

Tuesday, December 6, 2016

HOME FOR THE HOLIDAYS

It's that magical time of year when we "Deck our Homes!" Come on over.... 


Foyer's give us the first glimpse into a person's home. They actually say a lot about us. It doesn't matter if the space is large or small there's always a way to create something beautiful giving that lasting first impression.

By adding a simple golden branch (Pier One Imports) to an existing vase and a twiggy sleigh trimmed with fur (World Market) filled with a simple Poinsettia (Walmart) gives our foyer a festive feel. I placed my new  favorite Christmas at Designers Homes Across America book (Amazon Prime) at the top of stack to help elevate the vase to the proper height for the vignette to be balanced.


Across the hallway sits a simple ivory Bergere chair draped with a colorful plaid Christmas afghan and Noel pillow, a perfect holiday punch of color.


On the buffet are two silver candlestick lights with a beautiful festive tie on ornament accent, a gift from my niece. The Vietri platter is the perfect shade of ivory to hold a strand of tiny white lights. I placed the quaint little church on a clear cake tray, and  surrounded the tray with silver trees. The "Merry Christmas" sign, that lights, was a find in Homegoods this year. 


"Slim Jim" as our daughter's fondly named our foyer tree, fits nicely in his new home in the curve of the staircase. The woodland and ice theme on the tree glistens in the glow of the the lights. The red pinecone ornaments add just a touch of festive color. 

The woodland and ice theme is carried to the staircase along with the addition of icy sprigs and red poinsettia and berry pics.


Underneath our tree is the nativity that I painted many, many years ago and has become a family treasure.


Across from the staircase is the dining room. Since every room is open to one another, from the foyer to the living area, I decided to carry a touch of red into every room. There is just something about "red" at the holidays! Hubby just loves it!

The china cabinet holds simple white ceramic pieces with a splash of red in the form of goblets or ornaments. The snowy branches are a simple reminder of holidays past.


Speaking of holidays past, I painted the ceramic Santa below in 1975, around the same time of the nativity. Unfortunately, Santa was broken in the move, but hubby worked his magic and brought Santa back to life. Every year he holds our Christmas cards from family and friends. Gotta love my hubby for saving this memory for me!!


It was a year of change in many ways this year. With some of our Christmas decorations missing from the move, and some that had seen better years, it was time to replace a few things. 

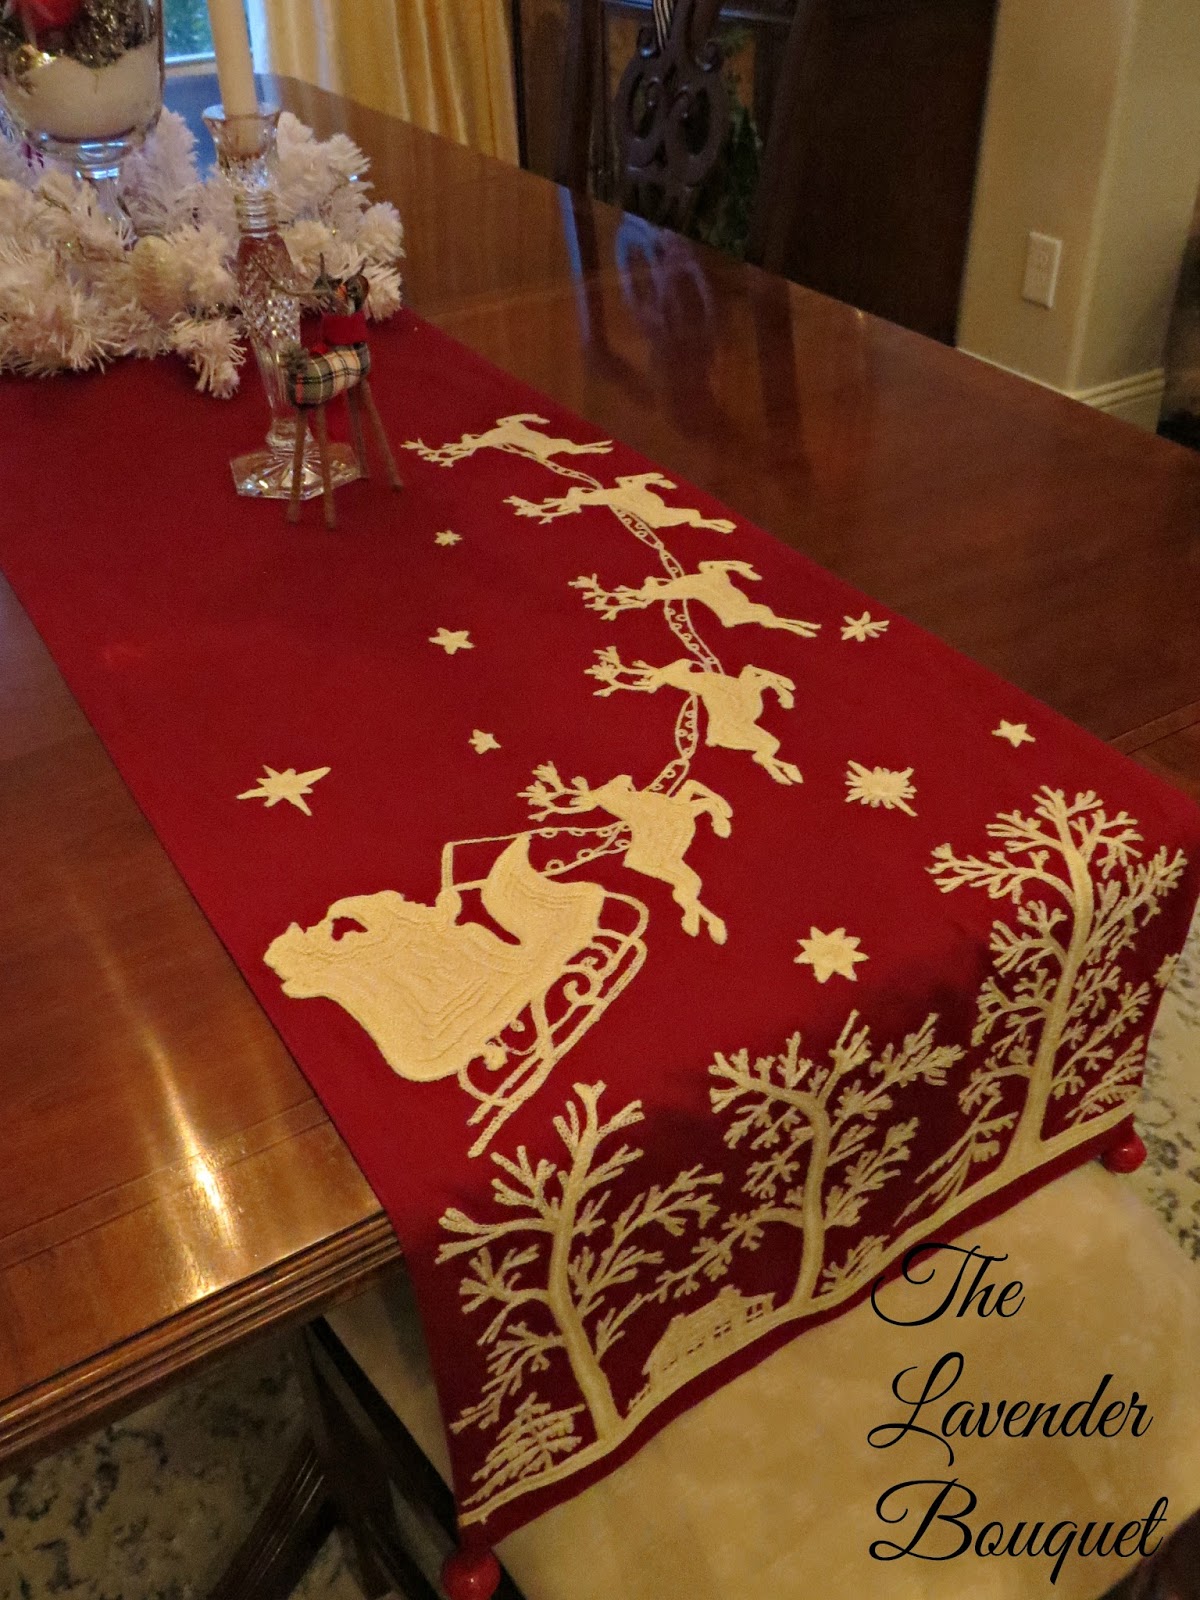
I was shopping in Pottery Barn and came upon this table runner. The color was outstanding and it was just too beautiful to pass up. The embroidered detail gives it a vintage feel. I added a simple white wreath with silver pinecones in the center. The Ethan Allen vessel is filled with snow, pinecones and red ornaments. There's that red color again!


 I found this cute little "stick plaid deer," and couldn't resist him at Pottery Barn.


The stockings were hung by the chimney with care. And take a look at that fire...so inviting on a cold evening keeping Santa and his reindeer nice and toasty!


The 2-story family room has cubed windows above adding some much needed extra light. Did you notice the mirror above the fireplace? Yes, it's the same mirror from our last "4" homes. A Pottery Barn purchase from the days we lived near the Palisades Center in NY. A neutral mirror is always a good purchase to hang above the fireplace mantel....the proof is here!

We wanted a fireplace stone that was indigenous to the area, so we chose to use Austin Stone bringing the look of Texas Hill country to our home. It adds a warmth to the high ceilings in the room, making it feel a bit more cozy!

The lanterns on the mantel were a purchase from Pottery Barn this year. I had Lumiere candles from my past fireplaces that I love....no matches required just a remote! They certainly look real don't they? (They are now sold in Bed, Bath and Beyond)


 View from the living room toward foyer and dining room.


Looking from the family room into the kitchen the sofa acts as a divider. I chose not to add a sofa table to keep the walkway open between the rooms. The floors downstairs are hand scraped solid oak with a Medium Brown stain color. They were another selection choice because of their popularity in Texas.

With a bit of maneuvering of our sofa the Christmas tree squeezes into the living room nicely. The live 10 ft. Balsam Fir tree can be seen as you enter from the front door.


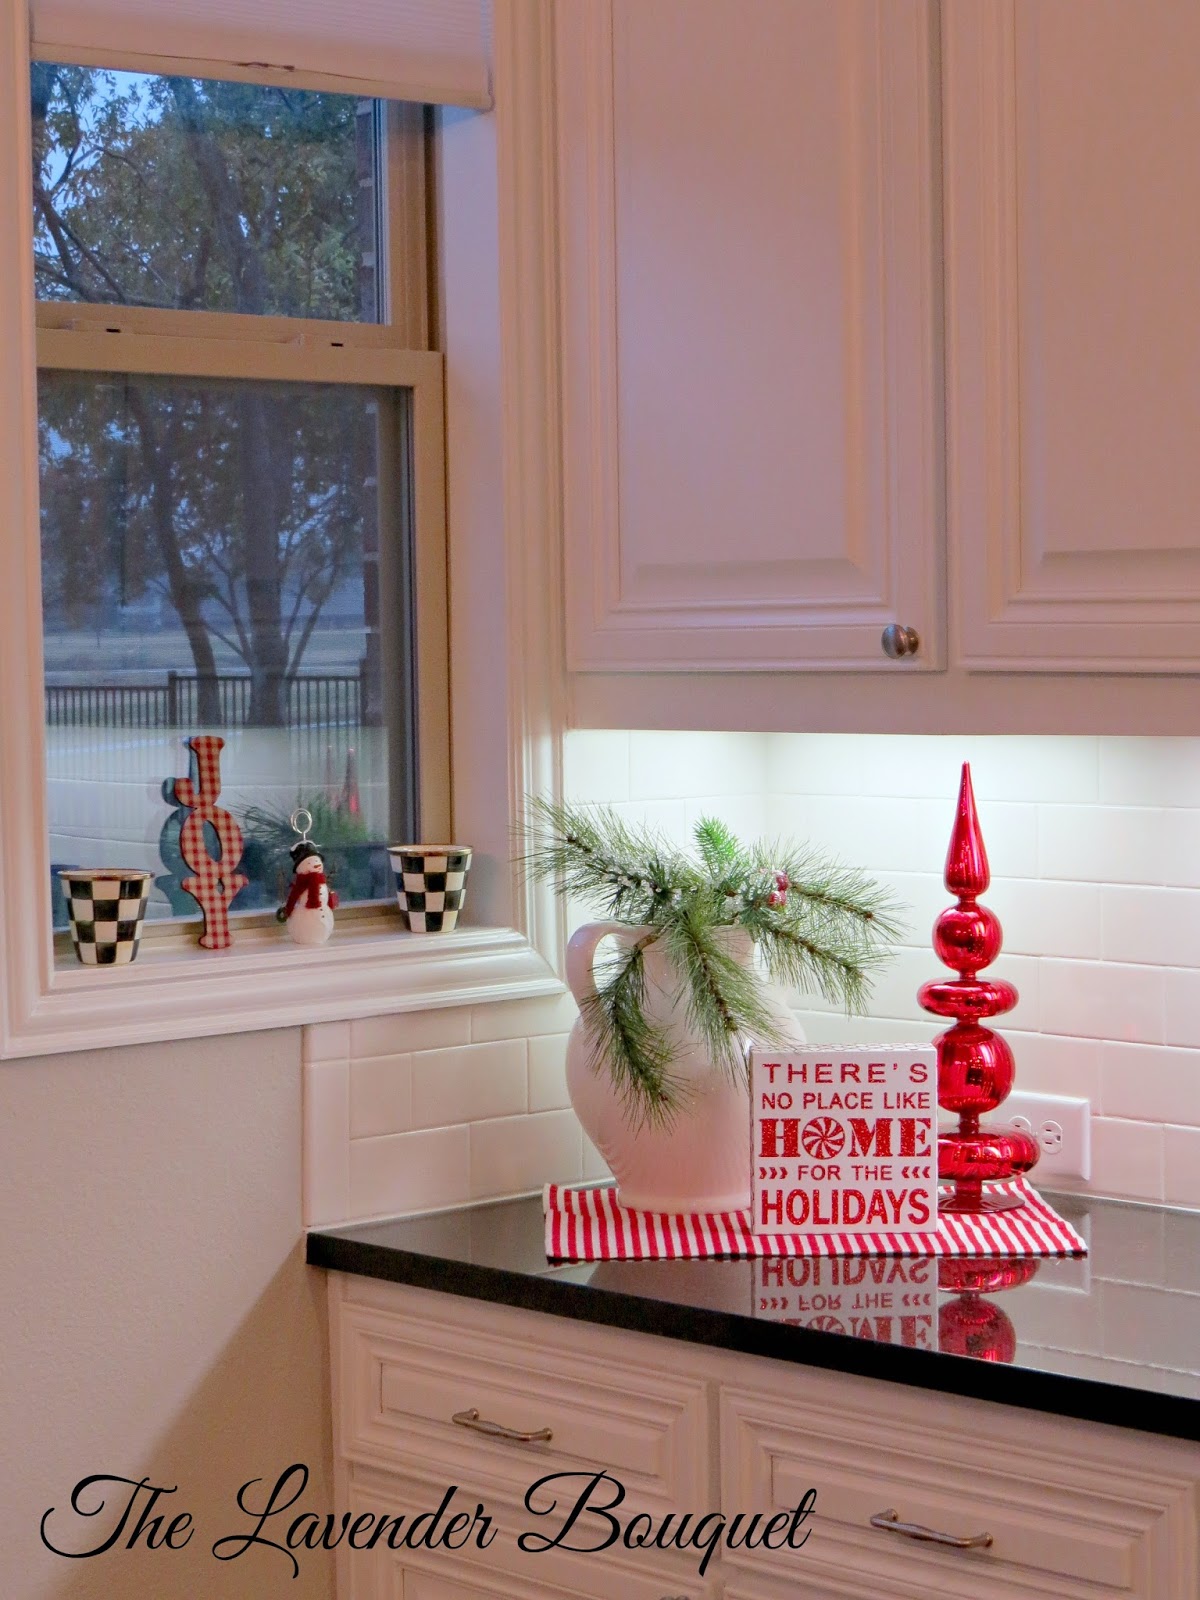
The kitchen has a few festive touches sporadically placed. I found this little ceramic vintage truck at Wal-Mart. I just couldn't resist him. Over the years my collection of Christmas cookbooks has grown to quite a few as you can see.


A few more festive touches....


The glass doored display cabinets get a Christmas feel by using a Christmas platter and a wooden reindeer.


I hope you enjoyed your visit today. From my family to yours we wish you a very

"Merry Christmas and a Happy New Year."

                            Kathleen


Tuesday, April 5, 2016

DIY CHAIR UPDATE

Welcome to Tuesday TLB friends,

I hope you all had a wonderful weekend. Today's DIY blog is all about how a subtle change can transform something into a brand new look..........

Tuesday, January 19, 2016

NEW HOUSE COLOR PALETTE

Good Morning TLB friends!

I've been so busy I just couldn't wait to share my last few days with you. After browsing the pages of our home inventory that is in storage, I have come up with a plan for "most" of our furnishings. Of course I had to pass this by hubby, who seemed a bit skeptical, but open to conversation on what rooms were in need of updates. He immediately sees those dollar signs and starts to panic!


Wednesday, May 27, 2015

SOFA CUSHION DILEMMA

We had a sofa dilemma. Our sofas are 10 years old. They are excellent quality and have fared all of our moves very well. The fabric and frame look terrific, but the foam on the inside corners of the cushions were showing signs of wear.

I called Ethan Allen, and because of the age of the sofas, I was referred to an aftermarket gentlemen. I made the appointment for him to come to our home, and give us a quote on replacing the foam in the cushions. 

Monday, September 1, 2014

FALL FOYER DECOR

Good Morning and Welcome to Labor Day! I hope you are all planning a wonderful day of celebration. 

I can hardly believe it's the 1st of September. With our summer packed with so much travel it seemed to just fly by. I must say I am ready for a few cool days. The kind of days filled with sunshine but a slight chill in the air. My favorite time of year here in the north.

Last week I carried all of my Fall decorations into my dining room and set up shop. I divided everything by category so that I could quickly grab what I needed ie. leaves, pumpkins, garland, twigs, etc. 

I thought I would start in the foyer this year. It's not as daunting as some of the other spaces. I have a beautiful blue and white porcelain vase that I wanted to keep on my chest. I just so happen to love crimson and orange with blue........and my trusty Fall pile of goodies certainly was full of that palette. Take a look......


Using a burlap placemat grounds the vase and brought more of a casual feel to the vignette.


I filled my Ethan Allen vessel with leaves of all kinds, some sparkly fall garland and topped it all of with a shiny metallic gold pumpkin. Then added a small Irish crystal vase filled with Bittersweet for another little shiny accent.


 And it was as easy as that!

Please leave us a comment and let us know what you think of this easy Fall foyer vignette! What is your color palette this Fall?

Have a wonderful day!

Kathleen

***Thanks so much for stopping by for a visit. Stop by anytime and tell your friends about us! 

Wednesday, May 28, 2014

CREATING A NATURESCAPE MANTEL & DIY VASE

Since I started blogging nearly a year ago, I have noticed an interesting change in how homeowners discuss how much they are spending on decorating. It used to be we didn't discuss prices, but that has certainly changed. Today, with so many DIYers, vintage thrift shoppers, and stores like IKEA, we all feel proud what we have done on so little! I like this new trend.....its fun, rewarding and let's face it, we all love to save money!

On the heels of saving money.......I have been laboring with how to decorate my fireplace mantel for Spring, quite honestly, by not spending a lot of money. I am all about recycling and reusing items by changing up their location.

I tossed around the ideas of colorful twigs, big urns to anchor and loads of other things. Of course I went to Pinterest and perused their pages of ideas, but nothing hit me. Then I was in JoAnn Fabric the other day and I found a small print that was very simple. It had ferns, a butterfly and some lettering painted on it. That was all I needed. I bought the print and built the mantel starting with my new little fern print. It reminded me of the woods when I was a kid where the ferns grew wild......hence my mantel theme was born.


I decided to make vases to incorporate into the theme using jars. Since I have already mod-podged and sprayed jars, I needed to try something else. I headed to Dollar Tree and found this cool lime green and white stripe clothesline and decided to wrap each jar with it. The color was great and would blend in nicely with the existing greens I was using.

Materials needed:

  •  Thin clothesline or twine (Dollar Tree) (My 3 jars took one spool of clothesline.)
  •  Elmers or Fabric glue
  •  Glue gun
  •  Old jars of various sizes
Instructions:
  • Unwind clothesline
  • Dab one spot on the very top of the jar edge with hot glue
  • Start applying the clothesline by pushing the end of the clothesline into the hot glue (Make sure it is secure before moving on.)
  • Apply Elmers or Fabric glue around each line pushing together the clothesline tightly so that there is no gap between rows. It is necessary to make sure you have enough glue on each line to keep things secure. The glue dries clear, so no worries about getting spots.
  • At the bottom of the jar as you near the end, dot it with the hot glue just as you did in the beginning.
It's that easy.......aren't they the cutest? 

  NATURESCAPE MANTEL


To complete the mantel I needed something a little larger on both ends to anchor the vignette. I brought out 2 of my Ethan Allen pieces from years ago, filled them with moss from the Dollar Tree and ivory flameless candles that I had in my entertainment stash. I love the way they flicker in the evening light. 

I also needed some flowing fern like vine that I found in JoAnn Fabrics to ground the picture.


At first I wasn't sure I would like all different shades of green on the mantel, so I added just a bit of color by using fresh flowers in the color of purple and white and that was just enough for me.


I'm really happy with the final results. It's quite simple and was so inexpensive. Why not look around your house to see what you have, re-purposing is so much fun. I love new perspectives on old objects. Is it time for you to freshen something in your home?

I hope you have enjoyed watching me build my new Naturescape Mantel. Well see you Foodie Friday for some heavenly deliciousness!

Until then--Happy Creating!

Kathleen

***Thanks so much for stopping by The Lavender Bouquet. We'd love to hear from you. Feel free to leave us a comment.


Tuesday, September 17, 2013

Renovation Wednesday!

Welcome to yet another renovation project! Our projects spanned a three month time period, with our plan being all major renovations would be completed before we moved in. We had rented an apartment for six months. The plan was for me to find a home, and us to close, and renovate all within the six month time period.

It was a very ambitious plan and a very busy time for us. To move things along quickly, we interviewed and selected our vendors ahead of time, prior to closing. This meant that since we didn't own the house yet, our awesome realtor, Ginger, had to stay with me for many hours while I walked through the house showing each vendor what we wanted done so that they could work up their proposals. I am happy to say that she and her husband are now our friends......thank goodness! (Go Lehigh!) As soon as we closed on the house, we signed our contracts with our vendors, secured dates and we were off!

 My days were spent at the house working as the General Contractor. With this being our "13th" home, it was business as usual for me. My husband spent his days adapting to his new job, and the building or renovation of our homes, depending on which one was required, was up to me. I guess this is why I LOVE building and remodeling so much. Each time acquiring more useful knowledge that ultimately saves us money in the relocation budget..........until I find something else I
just can't live without to add to the budget!

Below photos reflect before we started the renovation, the process of making the changes, and finally the completed dining room. Fortunately the dining room required minimal work. New wall, ceiling and trim color, removing  an old chandelier, and installing a new one, adding a dimmer switch, removing a swinging door that led to the kitchen, and ripping up old wood floor, and installing new. Whew!

It was so worth it.........hope you like the final look of our new Dining Room as much as we do!


                                                            Final Dining Room