Monday, September 30, 2013

Marvelous Monday--

The party may be over but the memories will be part of us forever. What a wonderful evening filled with friendship, laughter and great spirits! It was worth every second of preparation.

Thursday, the day before the party, consisted of last minute morning errands for final supplies with the remainder of the day doing food prep and final cleaning. The window washer made the windows and mirrors sparkle, enabling me to check that off my list, thankfully. By the end of the day I fell into bed.......still with those last minute lists swirling around in my head, note pad on my nightstand jotting them down as I remembered them.

Friday, day of the party....... started at 6:00 a.m.

FINAL LIST FRIDAY--The day included picking up ice, flowers, baguettes and finishing all of the food. As I finished, I plated each item on the platters that I had labeled a few days prior, and sealed them with plastic wrap. Ice was placed in all of the ice buckets, Blood Orange Margaritas were made and the bar stocked. Flowers that came from the supermarket were arranged in vases.

Time to shower and change.

Joe, our server, arrived one hour prior to the party to become familiar with everything.

It's Party time........

My husband and I greeted guests at the door while Joe made sure they were given their first beverage of the evening. He also set up several food trays to pass (photos below). I would highly recommend hiring a server if you are having 40 or more guests. We ended up with 51 and  this allowed time for us to greet guests and mingle throughout the evening with Joe taking care of the rest.

Hors d'oeuvre table set and ready for our guests. The tablecloth was purchased at Yvonne Estelles in Park Ridge, Illinois. It is Beauville, painted by hand in France.


These hors d'oeuvres were displayed on the table for nibbing as guests passed by. We featured a cheese tray from Zingerman's as a tribute to the days we lived in Ann Arbor, Michigan.
Some of the food was passed by server Joe. Upper right, Zucchini Rollups (big hit of the evening), lower left, Cheese Gougeres, lower right Shrimp Shooters. We also served Hot Roast Beef Mini Sandwiches.

The Bar and Beverage area was in our enclosed patio. The Blood Orange Margaritas were a beautiful Fall color and were a tribute to the days we lived in Houston, Texas.
 They were lethal!

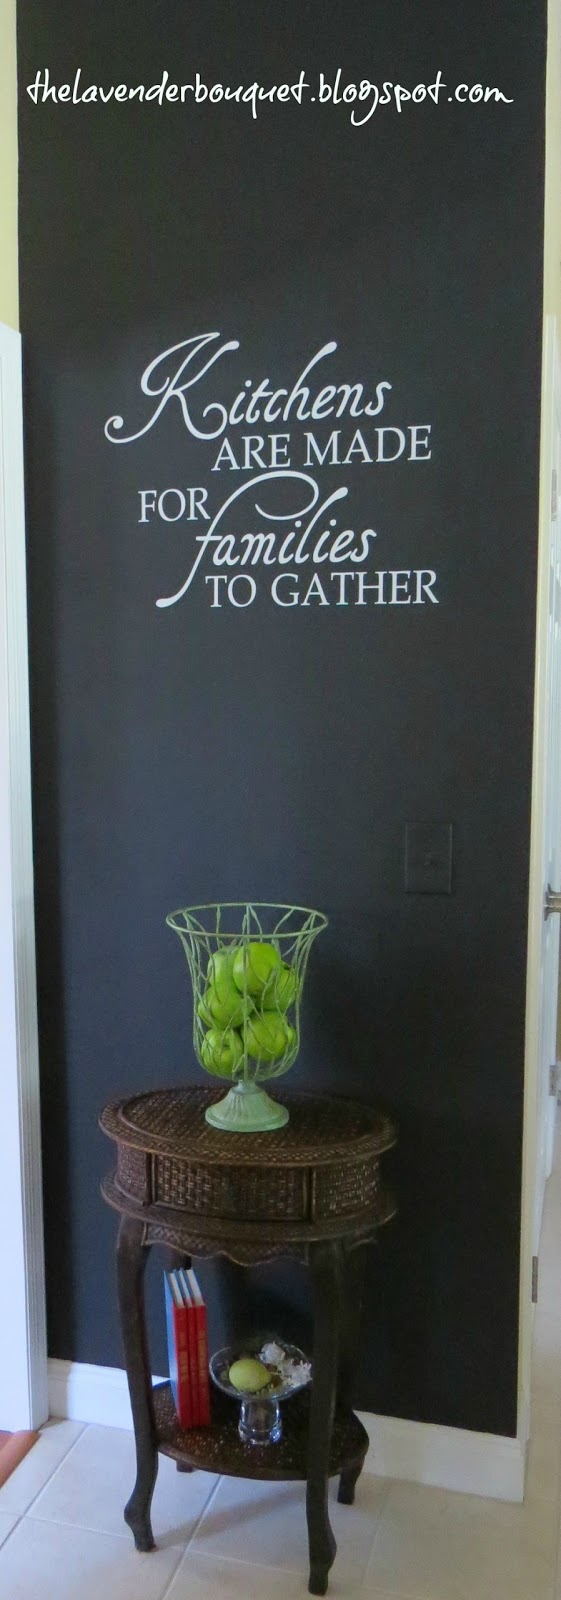
Sunflowers in the kitchen made a great Fall Bouquet. The kitchen is always one of the largest gathering places at our parties.

I made the centerpieces this year with all pumpkins, gourds, and flowers that I purchased at the grocery store and Farmer's Markets.

Another tribute of the evening, were Buckeyes from the days we lived in Perrysburg, Ohio. Huge hit!!

Family Room fireplace decorated for Fall.


Our day ended at midnight with my husband and I sipping our glass of wine.....feet propped up, reminiscing about the evening events. The tributes we made to some of the places we have lived was a hit and a great conversation starter. Not only did we support businesses we loved in our past, but we brought a little bit of who we are and where we have come from to our new friends.

 Watch my future blogs for the party recipes and decorating ideas!

 Awwww------parties can be so much fun!! I hope that the steps to organize a Cocktail Party will help you with your future parties.

ENJOY!

Wednesday, September 25, 2013

Cocktail Party Prep

It's Wednesday..........only two more days until the cocktail party. I am getting so excited. On Sunday I sat down and prepared my final lists in detail checking off my accomplishments as I completed them.

  • TO DO--which includes things like cleaning the house, preparing the yard, noting the Thursday window washer guy that will be coming, chilling trays, music play lists, making place cards for food, make a mani and pedi appt., and buying anything remotely related to a decorating need, cornstalks, pumpkins, mums, and stocking the frig with white wine, prosecco and beer. 
  • CONFIRMATION--call one week before ---D'Angelo's Italian Market Princeton, NJ.... to confirm my order and delivery of  2 Antipasta trays and 2 Italian cookie trays, along with the confirmation of a server that will be assisting at the party for 5 hours. It makes my life a little easier if I order something to add to the menu that doesn't require more man hours from me!
  • TO PURCHASE (non-food items)-- my husband and I completed this on Saturday. It includes everything from party decor to simple things like light bulbs. It is very detailed (because I HATE to run errands and get home and have forgotten something!) checking things off as we go and not coming home until the mission was completed. Keep in mind I do not do chaos well!
  • MENU--I have been gathering menu ideas from magazine, cookbooks, and my own tried and true recipe files. I find it a bit more challenging to have a party these days with all of the food allergy issues that some guest may have; gluten intolerance, lactose intolerance, etc. Then there are the vegan, vegetarian etc. to consider as well. Keeping those in mind I crafted my menu making sure there was something for everyone. This is also the day that I choose what platters, dishes, trays and utensils I will be using and label them appropriately. I can just pull them out when preparing the food on the final day and plate them up. I also, do a dry run of where each platter will go on the tables, so the guess work at the last minute has been removed. It saves time and headaches in the end.
  • GROCERY LIST--Make a final grocery list after crafting the menu. Since I also purchase my flowers and ice from my supermarket, they are always included as well. My shopping day is either Tuesday or Wednesday, two-three days before the party. Sometimes last minute fresh bread etc. will require one day before pick-up.
  • FOOD PREP DAY-- One day before, I do as much food prep as possible.  I set aside the complete day. Cutting, chopping, assembling as many items that can be done ahead of time saves so much chaos on party day. I store everything in air tight containers, ready to place on trays the morning of the party.
  • DAY OF PARTY-- EARLY DAY---Finish food prep and assemble trays. Stock bar with ice and fill beverage containers. Arrange food trays..........and oh that's right.......... WHEW-----I have to get ready too! Now where is that black dress????

We are doing something unique this year. With all of our moves we have come across some of the most awesome foods. So many times we reminisce about the taste of something-----how delicious it was or if I only had this for our party. This year I decided to make that happen. I am using two companies from our past to add a personal story to our party; Zingermans Deli from Ann Arbor, Michigan and Marsha's Buckeyes, from Perrysburg, Ohio!!! I am also making our token Houston Texas Margarita.......with a Fall spin.

When the boxes arrived I was so excited............

We love Zingerman's City Goat Cheese, Manchengo Cheese, Fig & Walnut Preserves and of course American Spoon Cherry Preserves made for Zingermans. These will all be featured on our cheese platters! 

When we lived in Perrysburg, Ohio, Marsha had started her business in her basement. She is now shipping just about everywhere. Our box arrived neatly packed with ice in this perfectly arranged tray of #94 buckeyes.......pure heaven....peanut butter and chocolate!! AND won't these look beautiful displayed with our FALL theme?  


When we lived in Houston, Texas I came across a Margarita recipe that will knock your socks off. I have shared this recipe and at the end of every evening it has been served there are a group of happy guests! I am making a new twist on our traditional recipe, paying homage to Houston, with a Fall version.


Well its time for me to get busy with the list of the day!  I hope you found this segment helpful with your party planning, maybe taking away an idea or two.

I will be back with the final party blog next Monday. Until then............


ENJOY  your weekend! 


Monday, September 23, 2013

Marvelous Monday--Weekend Tailgating!

What a weekend! The first day of Fall has officially arrived and my husband and I spent an awesome Saturday with friends doing what many Americans like to do......watching football and tailgating!!

Wiki tells us that a tailgate party originated in the US......imagine that. Consuming alcoholic beverages and grilling food in parking lots at stadiums is as American as "apple pie!"

My husband and I were bowled over by the fantastic menu that our friend Brendan, prepared.
We started with his delicious lobster sliders that melted in your mouth. (those New Hampshire boys sure do know their lobster!) Moved on to freshly ground cheeseburgers, and our contribution Ina Garten's French Potato Salad, ending with Ginger's mini Brownie bites. Along the way of course the customary chips and salsa, and tasty beverages. Yummy!


Ina Garten's French Potato Salad                                                                        http://www.foodnetwork.com/recipes/ina-garten/french-potato-salad-recipe/index.html  

We were one happy group after finishing all of that deliciousness! Thank you to our friends, Ginger and Chef Brendan, and thank you to their sweet daughter "M" for attending Lehigh!

The game was a "nail biter" to quote Ginger........with Lehigh beating Princeton at the very end 29-28. What a day.......great friends, great food and a winning team!


Were any of you fortunate enough to attend a game this weekend? What team were you watching and what did you serve? It's time to get our tailgating recipes floating around.........the season is just beginning!!

Please share your favorite tailgating recipes and ideas with us!


Friday, September 20, 2013

TGIF---Grout Cleaning & Fall Patio Preparation

TGIF!  It has been quite a week for me this week. Whew.........I must say the hours it takes me to prepare for a party are exhausting.........at least at my age! If you were to ask my husband, he would say that I go a bit crazy with it, but we won't go there right now. Besides I think it is in my bloodline, my sister goes crazy preparing for her parties too!!

Yesterday, was a beautiful day, low 70's and sunny. It was a great day to prepare the gardens and
patios for the party. After all, it is only one week away. It's kind of sad in a sense that most of the beautiful Spring flowers had lost their color and were ready to be replaced. The coleus, however, looked beautiful. Adding colorful mums to the mix of existing coleus, always gave our patios a nice look for Fall. I use my tried and true Indiana University colors---Cream and Crimson, something I adopted years ago when two of our daughters attended there. They are always so classic.


 The marigolds are still prolific and giving a nice yellow and orange burst of color along with the perimeter of my perennial bed. The Prairie grass is beautiful this year. I love the cabernet color........this is one of my favorite grasses. You cannot beat that color paired with orange and yellow!
 
After, finishing outside I focused my attention inside. While my husband travels I try to accomplish things on the preparation list that may take me a bit longer. 

We have a very light ceramic tile floor in our kitchen and when we moved in, it looked like this. I could not imagine how any floor could become that dirty. Where is that nice cream tile???

At the time we hired a tile company to come in, clean the floor thoroughly, changed the grout to a lighter color and then had it sealed. This was to help with dirt accumulating in the grouted areas.


Unfortunately, after two years our kitchen grout (BELOW) was showing the signs that a good cleaning was required. When I watched the gentlemen two years previously cleaning the grout I
thought, oh, I can do that!


I hate admitting this but........the lower right is my dirty grout. I used Chlorox and a great CVS toothbrush to get into the grout cracks, using paper towel to wipe away the dirt. I then steam cleaned the tile 3 times to remove the residue.

The left side, and top of photo reflect my results, however, I never imagined it would take me "5" hours and 3 Motrin to complete!

Maybe my husband is right, I may be a bit crazy. All I could think of is the $$$$ that I was saving........and thinking about how I could now buy those new TIEKS travel shoes!

Wishing you a wonderful weekend!!


Tuesday, September 17, 2013

Renovation Wednesday!

Welcome to yet another renovation project! Our projects spanned a three month time period, with our plan being all major renovations would be completed before we moved in. We had rented an apartment for six months. The plan was for me to find a home, and us to close, and renovate all within the six month time period.

It was a very ambitious plan and a very busy time for us. To move things along quickly, we interviewed and selected our vendors ahead of time, prior to closing. This meant that since we didn't own the house yet, our awesome realtor, Ginger, had to stay with me for many hours while I walked through the house showing each vendor what we wanted done so that they could work up their proposals. I am happy to say that she and her husband are now our friends......thank goodness! (Go Lehigh!) As soon as we closed on the house, we signed our contracts with our vendors, secured dates and we were off!

 My days were spent at the house working as the General Contractor. With this being our "13th" home, it was business as usual for me. My husband spent his days adapting to his new job, and the building or renovation of our homes, depending on which one was required, was up to me. I guess this is why I LOVE building and remodeling so much. Each time acquiring more useful knowledge that ultimately saves us money in the relocation budget..........until I find something else I
just can't live without to add to the budget!

Below photos reflect before we started the renovation, the process of making the changes, and finally the completed dining room. Fortunately the dining room required minimal work. New wall, ceiling and trim color, removing  an old chandelier, and installing a new one, adding a dimmer switch, removing a swinging door that led to the kitchen, and ripping up old wood floor, and installing new. Whew!

It was so worth it.........hope you like the final look of our new Dining Room as much as we do!


                                                            Final Dining Room


Monday, September 16, 2013

Marvelous Monday----Fall Foyer

Last week the weather was so beautiful it begged me to get outdoors and create. I took some time to decorate the front porch. The addition of my new Fall wreath (previous post), and by taking advantage of the still beautiful purple Petunias, Dusty Miller and Licorice Vine, left-over from my Spring planting in the urns.......I only needed to add the color of Mums, and my decorative pumpkins. The white monogrammed pumpkin (I told you I love Monograms) was a project from 2012.

I purchased a  faux white pumpkin from Michael's and since my husband is great with a steady hand,
he painted the black "B" on the pumpkin for me. A little stencil paint and some patience can achieve this. You could use a stencil if you don't have a "hubby with a steady hand."

Then I turned my juices to the inside. After all the party is only 11 days away so it is time to check everything outdoors off my list!  Speaking of the party........the invitations were mailed 3 weeks ahead of time (as Emily Post recommended) and the RSVP's are coming in!!


Now focusing inside...... I started in the foyer. Since the Foyer is where first impressions are formed I wanted to add something a little bit more impressive using my Fall theme. I purchased a Starburst mirror at Homegoods (I love Starburst mirrors made from any material) and thought I would try to use it to add a bit of glitz to my vignette. I love combining shiny mercury glass with glazed and Tuscan pottery pieces. Since the wall is curved where I needed to hang the mirror, it presented a bit of a challenge but by using a little longer screw than normal, and the mirror hangs nice and straight.

Always, group in odd numbers and don't make things too matchy, matchy. It makes the look much more interesting. (To add some needed height to some of the objects, I love using books in complimentary colors.) I filled the Mercury glass vase with willow branches and twigs with green berries. Faux silver and gold pumpkins were added with beaded garland in the urns. Laying a few leaves around the base of the urns makes the vignette complete. Not bad for using leftover Fall decorative items from previous years and a Homegoods mirror! This is my result--


s


How about this for a "HELLO and WELCOME?"  Remember those words--first impressions.

Did you start on your Fall projects yet? Please share with us.....we would love to hear about them.

Wishing you a Marvelous Monday!!

Friday, September 13, 2013

Foodie Friday-A touch of Lisbon!

A year ago my husband and I were fortunate enough to be able to commemorate our "36th Anniversary" by taking a trip abroad to Portugal and France.

Exciting, adventurous, romantic, educational, beautiful and gratifying would be how I would describe our trip. We had the time of our lives!

From the beginning planning stages we both agreed that one of the things we would do was sample local fare from whatever region we visited. Our first stop was Lisbon, Portugal. 


We stayed in a lovely hotel --Hotel Avenida Palace in the center of Lisbon. http://www.hotelavenidapalace.pt/en/hotel-overview.html?gclid=CPm7xIXmvrkCFUid4AodeBkAxw
By being centrally located we were able to walk everywhere. Each evening we ate our dinner at a different restaurant in the square. 

Feeling adventurous our first dinner in town, was Portugese Paella. We were delighted at the taste of chorizo, shrimp, olives, and spices with delicious flavors that all melded into this awesome dish. 

With our trip being one year ago I decided to recreate something similar to our dinner for my husband last week.I made a Chicken Paella with Sausage and Olives from Ellie Krieger, the same dish we introduced to  our daughters by teaching them how to cook this last Christmas. It is such an easy recipe that we all love.

Hope your family enjoys this as much as mine!!


Chicken Paella with Sausage and Olives

1 tablespoon plus 2 teaspoons olive oil
3 ounces chorizo sausage, casing removed, sliced into 1/4 inch rounds
1 pound skinless boneless chicken thighs, cut into 1-inch pieces
1 medium onion, chopped
2 cloves garlic, minced
2 1/2 cups low-sodium chicken broth
1 10-ounce package frozen peas
1 cup uncooked white rice
1 large ripe tomato, chopped
1/4 cup sliced green Spanish pimento-stuffed olives
1/2 teaspoon salt
1/4 teaspoon freshly ground black pepper
1/8 teaspoon ground tumeric
Small pinch of saffron threads

Preheat oven to 375 degrees. Heat 1 tablespoon of the oil in a large, skillet over med-high heat. Use a skillet that has a cover. Add chorizo and cook until brown. Add chicken and stock, stirring until browned, about 5 minutes. Transfer to plate.

Heat remaining 2 teaspoons of oil in skillet. Add onions, and cook, until softened and translucent, 3-5 minutes. Return the chicken and chorizo to the skillet and add chicken broth, peas, rice, tomato, olives, salt, pepper, turmeric and saffron. ( I did not purchase Saffron because it is very costly and the dish tasted great without it!)

Bring to a boil, cover and transfer to oven. Cook until the rice is tender and the liquid is absorbed, 25-30 minutes.

*** I have an induction cooktop which requires "special" cookware. I made this dish with my pan on the stovetop and transferred the contents into a pyrex casserole dish with a cover for baking.

SOURCE-- So Easy Cookbook by Ellie Krieger
http://www.amazon.com/So-Easy-Luscious-Healthy-Recipes/dp/B00D1GD7JG


Wednesday, September 11, 2013

9/11 Tribute

September 11, 2001 forever changed the lives of all Americans! 


 A montage of eight images depicting, from top to bottom, the World Trade Center towers burning, the collapsed section of the Pentagon, the impact explosion in the south tower, a rescue worker standing in front of rubble of the collapsed towers, an excavator unearthing a smashed jet engine, three frames of video depicting airplane hitting the Pentagon. 
SOURCE-- http://en.wikipedia.org/wiki/September_11_attacks

 But out of the ruble arose a stronger, United States of America!


Freedom Tower--Summer of 2012


Our hearts will always hold a very special place for those that lost their lives so senselessly, and the families left behind in the 9/11 attacks on this great country..... 
"Land of the Free and Home of the Brave!"


We gain strength, and courage, and confidence by each experience in which we really stop to look fear in the face....we must do that which we think we cannot.

Eleanor Roosevelt


Monday, September 9, 2013

Pumpkin-Cranberry Muffins

 Fall produce is everywhere right now. The apples, peaches, squash and even pumpkins are looking so beautiful this year. Although I am no expert, my thoughts turned to all of the rain we had when I taste all of the deliciousness.

I don't know what it is about pumpkin, but as soon as I see it fresh, I have to bake......something, anything, and pumpkin muffins came to mind first.

My neighbor had recently loaned me her professional steamer so that I could steam my draperies and I wanted to "thank her." She is one of those neighbors that has been there for me since we moved in nearly two years ago. She is a fountain of information that has saved me many AOL searches (a plug for my youngest daughter) and trial and error in search of so many things in our new area.

It was my perfect opportunity to bake something....something that would make the house smell like Fall. I chose Pumpkin-Cranberry muffins and if you can imagine the smell permeating my house, the taste was even better!

I hope you enjoy this  healthy Pumpkin-Cranberry Muffin recipe(199 calories) taken from Cooking Light. SOURCE--(http://www.myrecipes.com/recipe/pumpkin-cranberry-muffins-10000001673146/
I have to admit as soon as they came out of the oven, I sampled one just to make sure they were up to my standards for gift giving........

Do you have someone that might enjoy a little "thank you?" Why not give them a little Fall treat
or simply bake them for your family.

Hope you enjoy this little bit of Fall----------by the way our Sycamore leaves are falling like crazy already!


Friday, September 6, 2013

DIY--Chalkboard & Vinyl Art Wall

Long before I thought about making my little coffee nook in the kitchen, I had an idea to turn the wall across from it into a chalkboard wall. (not to use literally but to display a meaningful phrase) I had found this phrase in vinyl lettering on Etsy that I loved.  It reads; "Kitchens are Made for Families to Gather."

When thinking of our family through the years, this phrase was so appropriate and it still is. When the girls are home it is so much fun because they pitch in and help from meal preparation to cleaning up.  Now that they are older they have favorite recipes of their own and enjoy sharing them with us too.

About three years ago at Christmastime, I came up with an idea to teach the girls how to make something food related that they had never made or even tasted before. Our first year was a Yule Log, and last year was Paella which was chosen as a result of a Fall trip to Lisbon where my husband and I had enjoyed this dish for dinner one evening. So as a result of adding our new Christmastime tradition, we added a new dimension to the meaning of "our family gathering in our kitchen."

The project I had in mind meant changing the entire look of the small wall situated directly across from the "new coffee nook." I purchased one quart of black chalkboard paint, painted the wall with two coats of paint and let it cure for about 2 1/2 weeks.

PREPARE THE VINYL DECAL---I laid the vinyl decal on a flat table surface. Pressing firmly over the entire decal with the edge of a credit card or similar object.  This activates the bond between the vinyl and the transfer tape.

PLAN YOUR LAYOUT--I measured the height where I wanted the phrase to be hung. My measurement was from the ceiling to the top of the transfer paper where the phrase began. I marked this with painters tape. I also measured and marked with painters tape the center of the wall so that I could center the phrase on the wall.

At this point lift the vinyl up starting from any corner, slowly peel the thick white backing away, carefully making sure that the vinyl stays on the transfer tape side. (see below)


I used a paint edger and a credit card and started at the top center and worked my way to the outer edges, carefully rubbing over the vinyl to secure it to my chalkboard surface. Once you have done this, carefully remove the transfer tape, making sure that the vinyl lettering is sticking to your surface.


This is my finished wall.......


Our boring little area is now useful, and fun. The new phrase on our wall, gives our kitchen a warm and inviting feeling.........which is "the most important" thing I want our family and guests to feel as they enter our home!

HOME is where the HEART is!!

Hope you enjoyed this segment of DIY..........


Tuesday, September 3, 2013

DIY Fall Wreath

As I turned the page of my calendar to September and the school buses began to drive the streets, my thoughts turned to Fall. I love Fall! It is such a beautiful season in the North and one that my husband and I really enjoy. He of course for football, and me because I love the crisp air and beautiful displays of color that can only be seen this time of year.

After taking a trip north to Rhinebeck, NY and into NYC for a little exploring over the weekend, we spent yesterday purchasing my yearly fall mums for pots and decor around the house. Of course this means that part of my day today was spent planting our new mums. My first step outside starting the Fall decorating process.

This afternoon I spent crafting a new Fall wreath for our front door. I am absolutely in LOVE with the purple/plums of the 2013 Fall fashions, therefore, it was only fitting that I incorporated this color into my new wreath for our front door below.


The following is what is needed to make a wreath similar to mine:

1.  One 24" grapevine wreath
2.  One spool of ribbon.
3.  Two sprigs of flowers of your choice.
4.  Two sprigs of leaves of your choice.
5.  Two sprigs of a coordinating softer fill-in green.

You will need a hot glue gun, and a couple of tacks. Disassemble the stems.  You may remove flowers and greens from stems or leave a short stem which enables you to glue a bit easier to the wreath. The wire like stems can be wound around the wreath and glued also.

Arrange your flowers first and then fill in with your leaves and soft greens. Make sure that everything is secure with glue. Measure the distance from the top of your door frame to where you want the wreath to hang and add about 6 inches or so. (remember you are doubling this as this loops around the top of the wreath, leaving the opening to overhang on the back of the door about one inch)

Wrap (loop) the ribbon around the wreath leaving the opening at the top, adjust the length where you want the wreath to hang (using a step stool makes this easier) and hammer two tacks into the wooden top edge of the door. Trim excess.

  Photo reflects one tack, but two is ideal for added strength. Most exterior doors will have a wooden core enabling you to use this process to hang.


I hope you enjoy making your Fall wreath....... adding a beautiful bit of color as you WELCOME FALL into your home!

I am looking forward to sharing another DIY project from my kitchen on Friday......stay tuned!!