Showing posts with label chalkboard wall. Show all posts

Friday, December 13, 2013

House Tour 2013-Table Vignettes

I love making festive vignettes throughout the house. Little surprises here and there of more holiday cheer. Here are a few of my tabletop creations this year.

Last year I found this covered house. I just fell in love with it. I added leftover greens from other projects, ribbons, lights and glittery poinsettias and this is the final creation on our coffee table.

This is the very first year I have ever displayed our nativity on a sofa table. I normally placed it underneath our Christmas tree. I rather like its location this year, as it is much more visible to everyone as they enter the family room.  I actually painted this in ceramics class in "1981."  Our nativity has been displayed in all of our houses, and traveled well throughout all of our moves. It is one of most precious Christmas displays we have.
This year I added another Villeroy Boch piece. I loved this scalloped dish and the gorgeous detail.
1. The first photo is of our tree skirt. This was embroidered in Perrysburg, OH years ago. Santas and our family last name complete the beautiful skirt.
2. Santa and his bag of toys, mercury glass candlesticks and DIY Christmas trees made from styrofoam and ornaments glued on,  are on top of our TV unit.
3. A new addition this year in the next photo is the green ceramic Christmas tree from Pottery Barn, and the hurricane lantern next to it. The Pottery Barn tree may be lit from within with strings of lights for a really pretty affect.
4. The next photo features the  NOEL DIY pillow project that I made earlier this season, and a beautiful Tartan plaid Santa--a result of a Home Goods shopping trip!

 Last but not least, I transformed my previous DIY chalkboard giving it a more festive look. I added the framed "B" and of course the 3 tiered glass pedestal dishes were filled with snow, glittery pine cones, silver ornaments and my little white owl, a new gift this year! I added the lights as a nice touch for an evening glow.


Isn't he cute?


This completes the vignettes throughout the house, but wait there is more  holiday decor coming up!

ENJOY!
K


Friday, September 6, 2013

DIY--Chalkboard & Vinyl Art Wall

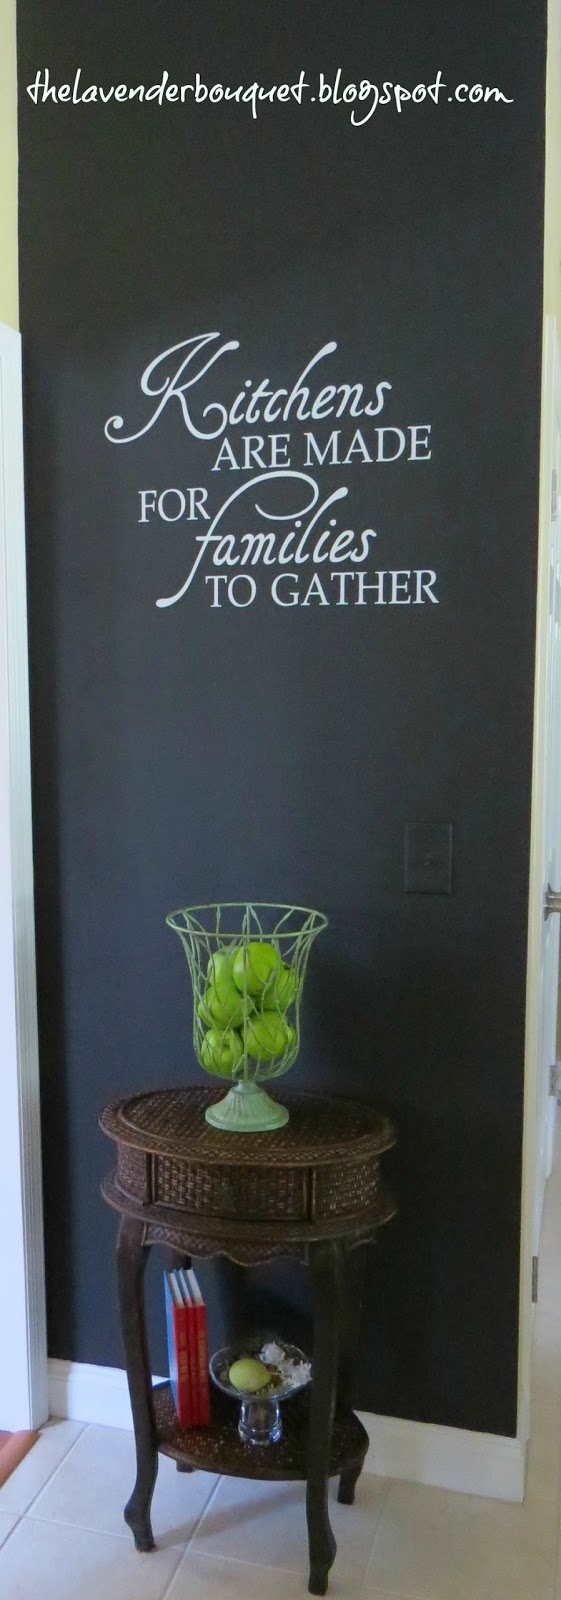
Long before I thought about making my little coffee nook in the kitchen, I had an idea to turn the wall across from it into a chalkboard wall. (not to use literally but to display a meaningful phrase) I had found this phrase in vinyl lettering on Etsy that I loved.  It reads; "Kitchens are Made for Families to Gather."

When thinking of our family through the years, this phrase was so appropriate and it still is. When the girls are home it is so much fun because they pitch in and help from meal preparation to cleaning up.  Now that they are older they have favorite recipes of their own and enjoy sharing them with us too.

About three years ago at Christmastime, I came up with an idea to teach the girls how to make something food related that they had never made or even tasted before. Our first year was a Yule Log, and last year was Paella which was chosen as a result of a Fall trip to Lisbon where my husband and I had enjoyed this dish for dinner one evening. So as a result of adding our new Christmastime tradition, we added a new dimension to the meaning of "our family gathering in our kitchen."

The project I had in mind meant changing the entire look of the small wall situated directly across from the "new coffee nook." I purchased one quart of black chalkboard paint, painted the wall with two coats of paint and let it cure for about 2 1/2 weeks.

PREPARE THE VINYL DECAL---I laid the vinyl decal on a flat table surface. Pressing firmly over the entire decal with the edge of a credit card or similar object.  This activates the bond between the vinyl and the transfer tape.

PLAN YOUR LAYOUT--I measured the height where I wanted the phrase to be hung. My measurement was from the ceiling to the top of the transfer paper where the phrase began. I marked this with painters tape. I also measured and marked with painters tape the center of the wall so that I could center the phrase on the wall.

At this point lift the vinyl up starting from any corner, slowly peel the thick white backing away, carefully making sure that the vinyl stays on the transfer tape side. (see below)


I used a paint edger and a credit card and started at the top center and worked my way to the outer edges, carefully rubbing over the vinyl to secure it to my chalkboard surface. Once you have done this, carefully remove the transfer tape, making sure that the vinyl lettering is sticking to your surface.


This is my finished wall.......


Our boring little area is now useful, and fun. The new phrase on our wall, gives our kitchen a warm and inviting feeling.........which is "the most important" thing I want our family and guests to feel as they enter our home!

HOME is where the HEART is!!

Hope you enjoyed this segment of DIY..........