
When searching for our new home my husband had just a couple of must-haves; his primary was a 2-story family room. I found the house with the family room with the help of our great realtor, Ginger, but not without some obstacles. The layout made the finished room a bit of a challenge, but I was up for it. The house also included my primary must-have, the Master Bedroom on the first floor!
I always turn to decorating magazines (House & Home and Veranda to name a couple), and I Google search websites that deal with this type of issue when I need some inspiration. Finding solutions to furniture arrangement in a room that has a fireplace that is off center on a wall, and pillars stuck at the end of a room as a divider, pushed my talents to a new level.
The photos you will see below are the BEFORE and AFTER photos which show the condition of the room when we purchased the house and changes we made prior to adding our furnishings.
  |
The previous owners mounted the TV above the fireplace, which is not centered in the room, which leads to alot of furniture placement issues. The room dimensions are 24 x 21 so there is a lot of room to work with, but the fireplace and TV placement, did not fall across from one another.
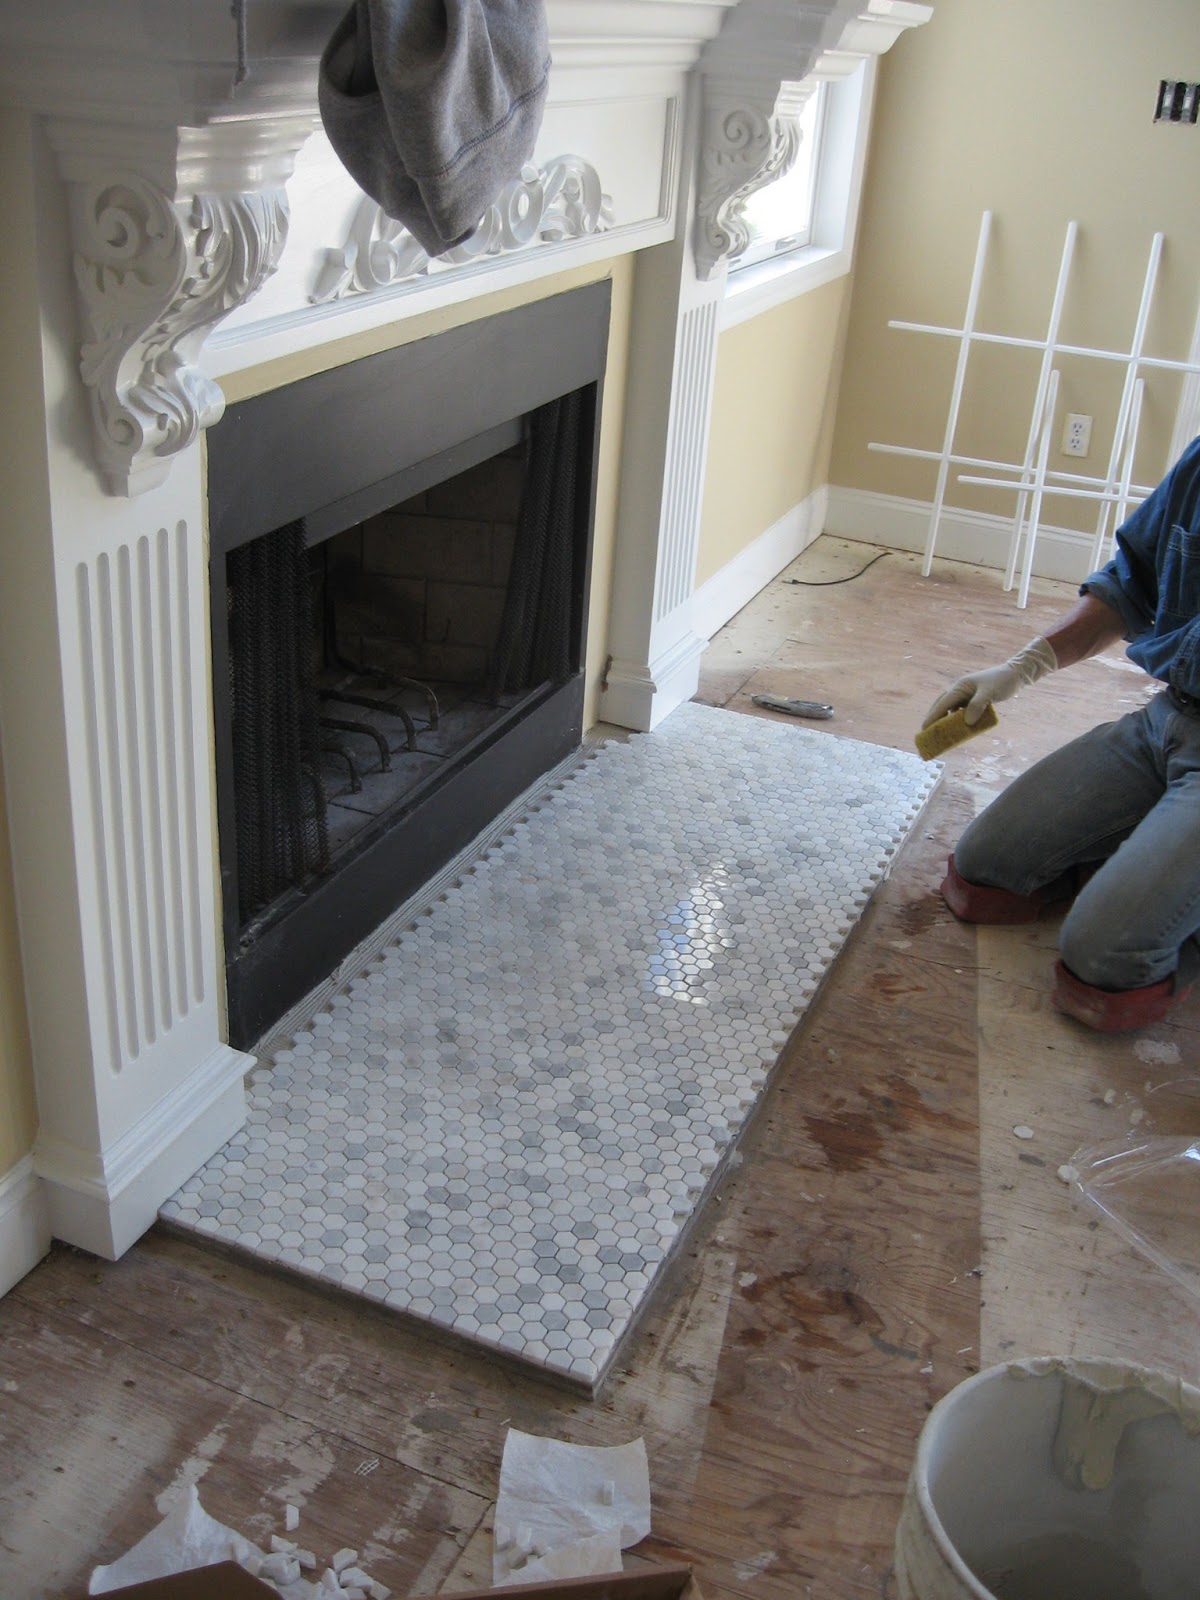
The fireplace mantle was too low and not wide enough for my Christmas garland, which is pretty important to me. The area surrounding the fireplace opening was painted wallboard, not fire proof. The hearth was a dingy grey blue slate with no character. The built-in speakers were not compatible with our system, so we had the carpenter remove the existing built-in ones, and covered them with fresh wallboard, plastering and sanding, prior to repainting. |
 |
 |
Between the family room and living room is a hall leading to the Master Bedroom and a Powder Room. This area was divided by using 4 columns in the family room.
(Previous owner furnishings.) |
 |
The two center columns were removed once it was determined they were not load bearing by our structural engineer.
|
 |
| White builder grade fans were replaced with Minka Aire,Tuscan style. These fans are not only energy efficient, but silent! Existing track lighting was replaced with these eyeball lights that focus light on the area above the mantle. |
 |
| By removing the columns the room was now open the complete depth of the house and painted a lighter more neutral color, Benjamin Moore HC-35 Powell Buff walls, 02 Super White trim and Ceiling. |

We decided to remove all of the existing carpeted areas on the first floor, and replace them with wood. We chose a vendor that we had never used before and after some of the floor had been installed, we realized that the quality standards did not meet what we required. We then chose another vendor with an Eco Friendly finish, and a much better grade, and manufacturing process. Mercier Select Maple was our final choice. This also allowed us to have very few imperfections in the grain, and a much stronger finish. We are very pleased with this product.

 |
| Mercier wood floors during installation. ************************************ |

increased the width and added some height. It was just the adjustment it needed.

 |
| All ready for my Christmas garland and stockings! |
OUR NEW FAMILY ROOM
 |
New Low E Energy Efficient slider Patio doors were added. I purchased fabric from
Boca Bargoons in Fort Myers, Florida by the bolt for the draperies. After much research, I decided on making a simple lined panel, and attached a tassel trim complimentary
to our furnishings. The rods and rings are from the Designer Kirsch line and are wood in a Mahogany color; a special order item from Calico Home. A simple Mahogany holdback from Kirsch was added so that a slight draping affect could be achieved.
This is a very simple treatment to make on your own keeping your drapery budget much less. Patience is required as there is a lot of bulk in the fabric as you feed it through your sewing machine, but it is well worth it. My friend, Mary H., from Florida gave me my first introduction to sewing a drapery like this. Don't be intimidated by its size, go for it, I did and look at the results! Thank you my dear friend Mary H.!! |


 |
| I hope that you all enjoy my labors of love. I will be posting more renovations in the future. Have a wonderful day! |
Gorgeous! Thanks for sharing. You did a beautiful job. Wish I could envision the end product the way you can!
ReplyDeleteThank you Patty.
DeleteKathie you have such talent !!,your house looks like it should be picture in a magazine.You put so much LOVE in everything you do.Keep it up Girl :)Love you Monica
ReplyDeleteKathie, all of your hard work shows the house looks like it should be picture in a magazine !! everything you do is with so much LOVE and it shows,congratulations on future endeavors. Love you Monica
ReplyDeleteThank you so much Monica. You are the sweetest!!
DeleteI am really surprised to see the way you are working on this blog. i like the content of this blog.
ReplyDeleteOnline Beds and Mattresses shop